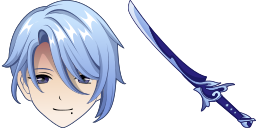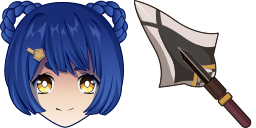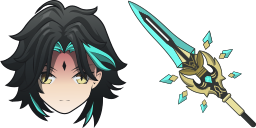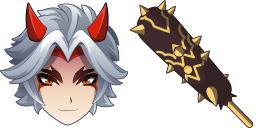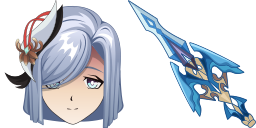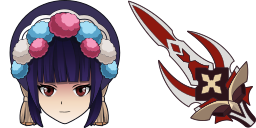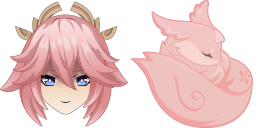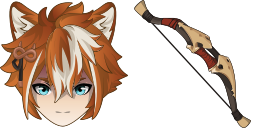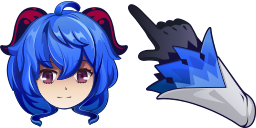
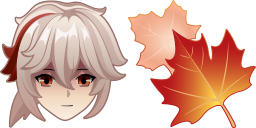
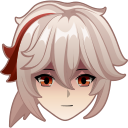
Превью курсора: Kazuha - 1 - cute-cursor.com

Набор курсоров

Kazuha

Genshin ImpactУстановлено 101 раз

Kazuha pointer for Chrome with elemental hover. Genshin Impact fan art.

В расширение

A good swordsman, capable of playing the role of both a primary and secondary damage dealer, thanks to his abilities, he can control the crowd on the battlefield. You have the ability to interact with your computer with our custom cursors. Genshin Impact for Chrome cursor set has a custom cursor Kazuha as a pointing device.

Файлы курсора

Скачайте файл или скопируйте готовый CSS и код для Roblox с правильным hotspot.

Курсор - 1 - cute-cursor.com

Курсор

Скачайте файл или скопируйте код для сайта, React, JavaScript или Roblox.

Вставьте этот CSS в стили. Координаты hotspot уже указаны.

.custom-cursor {
  cursor: url('https://cute-cursor.com/cdn/packs/1271/arrow.png') 44 0, auto;
}

Вставьте этот JavaScript, чтобы применить курсор с правильным hotspot.

const CURSOR_URL = 'https://cute-cursor.com/cdn/packs/1271/arrow.png';
const HOTSPOT_X = 44;
const HOTSPOT_Y = 0;
const CURSOR_FALLBACK = 'auto';

const cursorValue = `url('${CURSOR_URL}') ${HOTSPOT_X} ${HOTSPOT_Y}, ${CURSOR_FALLBACK}`;

// Apply to the whole page
document.body.style.cursor = cursorValue;

// Or apply to a specific element
// const target = document.querySelector('.my-element');
// if (target) target.style.cursor = cursorValue;

Скопируйте React-компонент и оберните им нужный контент.

import React from 'react';

const CURSOR_URL = 'https://cute-cursor.com/cdn/packs/1271/arrow.png';
const HOTSPOT_X = 44;
const HOTSPOT_Y = 0;
const CURSOR_FALLBACK = 'auto';

export default function CustomCursor({ children, className = '', as: Tag = 'div', style = {}, ...props }) {
  const cursorStyle = {
    cursor: `url('${CURSOR_URL}') ${HOTSPOT_X} ${HOTSPOT_Y}, ${CURSOR_FALLBACK}`,
    ...style,
  };

  return (
    <Tag className={className} style={cursorStyle} {...props}>
      {children}
    </Tag>
  );
}

// Usage:
// <CustomCursor>Your content</CustomCursor>

Загрузите изображение в Roblox, замените YOUR_ASSET_ID и вставьте LocalScript.

-- Roblox custom cursor
-- Image URL: https://cute-cursor.com/cdn/packs/1271/arrow.png
-- Hotspot: 44, 0
-- Size: 128x128
-- 1. Upload the image to Roblox and copy rbxassetid
-- 2. Replace YOUR_ASSET_ID below
-- 3. Put this LocalScript in StarterPlayer > StarterPlayerScripts

local UserInputService = game:GetService("UserInputService")
local RunService = game:GetService("RunService")
local Players = game:GetService("Players")

local player = Players.LocalPlayer
local playerGui = player:WaitForChild("PlayerGui")

local HOTSPOT_X = 44
local HOTSPOT_Y = 0
local CURSOR_WIDTH = 128
local CURSOR_HEIGHT = 128

local screenGui = Instance.new("ScreenGui")
screenGui.Name = "CustomCursorGui"
screenGui.ResetOnSpawn = false
screenGui.IgnoreGuiInset = true
screenGui.DisplayOrder = 999999
screenGui.Parent = playerGui

local cursor = Instance.new("ImageLabel")
cursor.Name = "CustomCursor"
cursor.BackgroundTransparency = 1
cursor.Size = UDim2.fromOffset(CURSOR_WIDTH, CURSOR_HEIGHT)
cursor.Image = "rbxassetid://YOUR_ASSET_ID"
cursor.ZIndex = 999999
cursor.Parent = screenGui

UserInputService.MouseIconEnabled = false

RunService.RenderStepped:Connect(function()
    local mouseLocation = UserInputService:GetMouseLocation()
    cursor.Position = UDim2.fromOffset(mouseLocation.X - HOTSPOT_X, mouseLocation.Y - HOTSPOT_Y)
end)
Указатель - 2 - cute-cursor.com

Указатель

Скачайте файл или скопируйте код для сайта, React, JavaScript или Roblox.

Вставьте этот CSS в стили. Координаты hotspot уже указаны.

.custom-pointer {
  cursor: url('https://cute-cursor.com/cdn/packs/1271/hand.png') 44 0, pointer;
}

Вставьте этот JavaScript, чтобы применить курсор с правильным hotspot.

const CURSOR_URL = 'https://cute-cursor.com/cdn/packs/1271/hand.png';
const HOTSPOT_X = 44;
const HOTSPOT_Y = 0;
const CURSOR_FALLBACK = 'pointer';

const cursorValue = `url('${CURSOR_URL}') ${HOTSPOT_X} ${HOTSPOT_Y}, ${CURSOR_FALLBACK}`;

// Apply to the whole page
document.body.style.cursor = cursorValue;

// Or apply to a specific element
// const target = document.querySelector('.my-element');
// if (target) target.style.cursor = cursorValue;

Скопируйте React-компонент и оберните им нужный контент.

import React from 'react';

const CURSOR_URL = 'https://cute-cursor.com/cdn/packs/1271/hand.png';
const HOTSPOT_X = 44;
const HOTSPOT_Y = 0;
const CURSOR_FALLBACK = 'pointer';

export default function CustomPointer({ children, className = '', as: Tag = 'div', style = {}, ...props }) {
  const cursorStyle = {
    cursor: `url('${CURSOR_URL}') ${HOTSPOT_X} ${HOTSPOT_Y}, ${CURSOR_FALLBACK}`,
    ...style,
  };

  return (
    <Tag className={className} style={cursorStyle} {...props}>
      {children}
    </Tag>
  );
}

// Usage:
// <CustomPointer>Your content</CustomPointer>

Загрузите изображение в Roblox, замените YOUR_ASSET_ID и вставьте LocalScript.

-- Roblox custom cursor
-- Image URL: https://cute-cursor.com/cdn/packs/1271/hand.png
-- Hotspot: 44, 0
-- Size: 128x128
-- 1. Upload the image to Roblox and copy rbxassetid
-- 2. Replace YOUR_ASSET_ID below
-- 3. Put this LocalScript in StarterPlayer > StarterPlayerScripts

local UserInputService = game:GetService("UserInputService")
local RunService = game:GetService("RunService")
local Players = game:GetService("Players")

local player = Players.LocalPlayer
local playerGui = player:WaitForChild("PlayerGui")

local HOTSPOT_X = 44
local HOTSPOT_Y = 0
local CURSOR_WIDTH = 128
local CURSOR_HEIGHT = 128

local screenGui = Instance.new("ScreenGui")
screenGui.Name = "CustomCursorGui"
screenGui.ResetOnSpawn = false
screenGui.IgnoreGuiInset = true
screenGui.DisplayOrder = 999999
screenGui.Parent = playerGui

local cursor = Instance.new("ImageLabel")
cursor.Name = "CustomCursor"
cursor.BackgroundTransparency = 1
cursor.Size = UDim2.fromOffset(CURSOR_WIDTH, CURSOR_HEIGHT)
cursor.Image = "rbxassetid://YOUR_ASSET_ID"
cursor.ZIndex = 999999
cursor.Parent = screenGui

UserInputService.MouseIconEnabled = false

RunService.RenderStepped:Connect(function()
    local mouseLocation = UserInputService:GetMouseLocation()
    cursor.Position = UDim2.fromOffset(mouseLocation.X - HOTSPOT_X, mouseLocation.Y - HOTSPOT_Y)
end)
Бесплатно

Get the Cursor Changer extension

Бесплатно для Chrome. Установите расширение и нажимайте «Добавить» у любого курсора.

Установить в Chrome