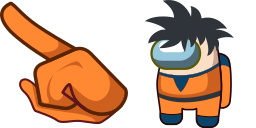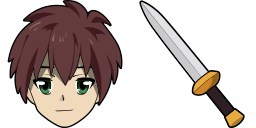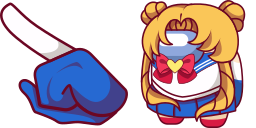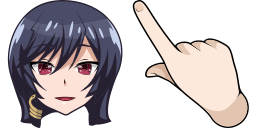
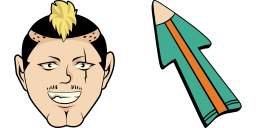
カーソルプレビュー: Nendou Riki - 1 - cute-cursor.com

カーソルパック

Nendou Riki

Anime16回追加されました

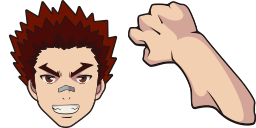
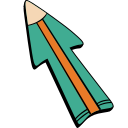
Nendou Riki cursor for Chrome - Saiki K classmate pointer with dumb grin hover hand. Anime fan art.

拡張機能に追加

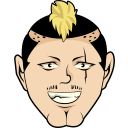
Riki is one of the main characters in The Disastrous Life of Saiki K. series, dominant traits are his apparent lack of intelligence and the scar on his left eye. Nendou Riki cursor element is a cute custom mouse and pointer cursor with stylish pointing.
カーソルファイル

ファイルをダウンロードするか、正しいホットスポットが設定済みのCSS、JavaScript、React、Robloxコードをそのままコピーしてご利用いただけます。

カーソル - 1 - cute-cursor.com

カーソル

ファイルをダウンロードするか、ウェブサイト、React、JavaScript、Roblox用の埋め込みコードをコピーしてください。

このCSSをスタイルシートに貼り付けてください。ホットスポットの座標は既に含まれています。

.custom-cursor {
  cursor: url('https://cute-cursor.com/cdn/packs/891/arrow.png') 54 0, auto;
}

このJavaScriptを貼り付けると、正しいホットスポットでカーソルが適用されます。

const CURSOR_URL = 'https://cute-cursor.com/cdn/packs/891/arrow.png';
const HOTSPOT_X = 54;
const HOTSPOT_Y = 0;
const CURSOR_FALLBACK = 'auto';

const cursorValue = `url('${CURSOR_URL}') ${HOTSPOT_X} ${HOTSPOT_Y}, ${CURSOR_FALLBACK}`;

// Apply to the whole page
document.body.style.cursor = cursorValue;

// Or apply to a specific element
// const target = document.querySelector('.my-element');
// if (target) target.style.cursor = cursorValue;

このReactコンポーネントをコピーし、コンテンツをその中にラップしてください。

import React from 'react';

const CURSOR_URL = 'https://cute-cursor.com/cdn/packs/891/arrow.png';
const HOTSPOT_X = 54;
const HOTSPOT_Y = 0;
const CURSOR_FALLBACK = 'auto';

export default function CustomCursor({ children, className = '', as: Tag = 'div', style = {}, ...props }) {
  const cursorStyle = {
    cursor: `url('${CURSOR_URL}') ${HOTSPOT_X} ${HOTSPOT_Y}, ${CURSOR_FALLBACK}`,
    ...style,
  };

  return (
    <Tag className={className} style={cursorStyle} {...props}>
      {children}
    </Tag>
  );
}

// Usage:
// <CustomCursor>Your content</CustomCursor>

画像をRobloxにアップロードし、YOUR_ASSET_IDを置き換えてから、このLocalScriptを貼り付けてください。

-- Roblox custom cursor
-- Image URL: https://cute-cursor.com/cdn/packs/891/arrow.png
-- Hotspot: 54, 0
-- Size: 128x128
-- 1. Upload the image to Roblox and copy rbxassetid
-- 2. Replace YOUR_ASSET_ID below
-- 3. Put this LocalScript in StarterPlayer > StarterPlayerScripts

local UserInputService = game:GetService("UserInputService")
local RunService = game:GetService("RunService")
local Players = game:GetService("Players")

local player = Players.LocalPlayer
local playerGui = player:WaitForChild("PlayerGui")

local HOTSPOT_X = 54
local HOTSPOT_Y = 0
local CURSOR_WIDTH = 128
local CURSOR_HEIGHT = 128

local screenGui = Instance.new("ScreenGui")
screenGui.Name = "CustomCursorGui"
screenGui.ResetOnSpawn = false
screenGui.IgnoreGuiInset = true
screenGui.DisplayOrder = 999999
screenGui.Parent = playerGui

local cursor = Instance.new("ImageLabel")
cursor.Name = "CustomCursor"
cursor.BackgroundTransparency = 1
cursor.Size = UDim2.fromOffset(CURSOR_WIDTH, CURSOR_HEIGHT)
cursor.Image = "rbxassetid://YOUR_ASSET_ID"
cursor.ZIndex = 999999
cursor.Parent = screenGui

UserInputService.MouseIconEnabled = false

RunService.RenderStepped:Connect(function()
    local mouseLocation = UserInputService:GetMouseLocation()
    cursor.Position = UDim2.fromOffset(mouseLocation.X - HOTSPOT_X, mouseLocation.Y - HOTSPOT_Y)
end)
ポインター - 2 - cute-cursor.com

ポインター

ファイルをダウンロードするか、ウェブサイト、React、JavaScript、Roblox用の埋め込みコードをコピーしてください。

このCSSをスタイルシートに貼り付けてください。ホットスポットの座標は既に含まれています。

.custom-pointer {
  cursor: url('https://cute-cursor.com/cdn/packs/891/hand.png') 25 0, pointer;
}

このJavaScriptを貼り付けると、正しいホットスポットでカーソルが適用されます。

const CURSOR_URL = 'https://cute-cursor.com/cdn/packs/891/hand.png';
const HOTSPOT_X = 25;
const HOTSPOT_Y = 0;
const CURSOR_FALLBACK = 'pointer';

const cursorValue = `url('${CURSOR_URL}') ${HOTSPOT_X} ${HOTSPOT_Y}, ${CURSOR_FALLBACK}`;

// Apply to the whole page
document.body.style.cursor = cursorValue;

// Or apply to a specific element
// const target = document.querySelector('.my-element');
// if (target) target.style.cursor = cursorValue;

このReactコンポーネントをコピーし、コンテンツをその中にラップしてください。

import React from 'react';

const CURSOR_URL = 'https://cute-cursor.com/cdn/packs/891/hand.png';
const HOTSPOT_X = 25;
const HOTSPOT_Y = 0;
const CURSOR_FALLBACK = 'pointer';

export default function CustomPointer({ children, className = '', as: Tag = 'div', style = {}, ...props }) {
  const cursorStyle = {
    cursor: `url('${CURSOR_URL}') ${HOTSPOT_X} ${HOTSPOT_Y}, ${CURSOR_FALLBACK}`,
    ...style,
  };

  return (
    <Tag className={className} style={cursorStyle} {...props}>
      {children}
    </Tag>
  );
}

// Usage:
// <CustomPointer>Your content</CustomPointer>

画像をRobloxにアップロードし、YOUR_ASSET_IDを置き換えてから、このLocalScriptを貼り付けてください。

-- Roblox custom cursor
-- Image URL: https://cute-cursor.com/cdn/packs/891/hand.png
-- Hotspot: 25, 0
-- Size: 128x128
-- 1. Upload the image to Roblox and copy rbxassetid
-- 2. Replace YOUR_ASSET_ID below
-- 3. Put this LocalScript in StarterPlayer > StarterPlayerScripts

local UserInputService = game:GetService("UserInputService")
local RunService = game:GetService("RunService")
local Players = game:GetService("Players")

local player = Players.LocalPlayer
local playerGui = player:WaitForChild("PlayerGui")

local HOTSPOT_X = 25
local HOTSPOT_Y = 0
local CURSOR_WIDTH = 128
local CURSOR_HEIGHT = 128

local screenGui = Instance.new("ScreenGui")
screenGui.Name = "CustomCursorGui"
screenGui.ResetOnSpawn = false
screenGui.IgnoreGuiInset = true
screenGui.DisplayOrder = 999999
screenGui.Parent = playerGui

local cursor = Instance.new("ImageLabel")
cursor.Name = "CustomCursor"
cursor.BackgroundTransparency = 1
cursor.Size = UDim2.fromOffset(CURSOR_WIDTH, CURSOR_HEIGHT)
cursor.Image = "rbxassetid://YOUR_ASSET_ID"
cursor.ZIndex = 999999
cursor.Parent = screenGui

UserInputService.MouseIconEnabled = false

RunService.RenderStepped:Connect(function()
    local mouseLocation = UserInputService:GetMouseLocation()
    cursor.Position = UDim2.fromOffset(mouseLocation.X - HOTSPOT_X, mouseLocation.Y - HOTSPOT_Y)
end)
100%無料

カーソルチェンジャー拡張機能を入手

Chrome用に無料でご利用いただけます。一度インストールしたら、お好きなカーソルの「追加」をクリックしてください。

Chromeにインストール