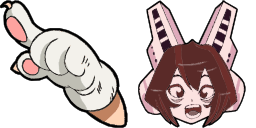
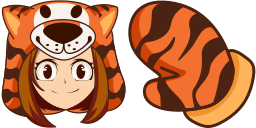
Превью курсора: Ochako Uraraka Holidays - 1 - cute-cursor.com

Набор курсоров

Ochako Uraraka Holidays

My Hero AcademiaУстановлено 45 раз

Christmas Ochako cursor for Chrome - holiday hero pointer with snowflake hover hand. My Hero Academia fan art.

В расширение

We created the Ochako Uraraka cursor in a tiger costume especially for the magical New Year holidays, for My Hero Academia fans, and not only. Pointer side shows Christmas Ochako pointer. Hover swaps to snowflake hover hand. Built for Chrome users browsing in Chrome. Works in Chrome via the Cute Cursor extension.

Файлы курсора

Скачайте файл или скопируйте готовый CSS и код для Roblox с правильным hotspot.

Курсор - 1 - cute-cursor.com

Курсор

Скачайте файл или скопируйте код для сайта, React, JavaScript или Roblox.

Вставьте этот CSS в стили. Координаты hotspot уже указаны.

.custom-cursor {
  cursor: url('https://cute-cursor.com/cdn/packs/603/arrow.png') 49 0, auto;
}

Вставьте этот JavaScript, чтобы применить курсор с правильным hotspot.

const CURSOR_URL = 'https://cute-cursor.com/cdn/packs/603/arrow.png';
const HOTSPOT_X = 49;
const HOTSPOT_Y = 0;
const CURSOR_FALLBACK = 'auto';

const cursorValue = `url('${CURSOR_URL}') ${HOTSPOT_X} ${HOTSPOT_Y}, ${CURSOR_FALLBACK}`;

// Apply to the whole page
document.body.style.cursor = cursorValue;

// Or apply to a specific element
// const target = document.querySelector('.my-element');
// if (target) target.style.cursor = cursorValue;

Скопируйте React-компонент и оберните им нужный контент.

import React from 'react';

const CURSOR_URL = 'https://cute-cursor.com/cdn/packs/603/arrow.png';
const HOTSPOT_X = 49;
const HOTSPOT_Y = 0;
const CURSOR_FALLBACK = 'auto';

export default function CustomCursor({ children, className = '', as: Tag = 'div', style = {}, ...props }) {
  const cursorStyle = {
    cursor: `url('${CURSOR_URL}') ${HOTSPOT_X} ${HOTSPOT_Y}, ${CURSOR_FALLBACK}`,
    ...style,
  };

  return (
    <Tag className={className} style={cursorStyle} {...props}>
      {children}
    </Tag>
  );
}

// Usage:
// <CustomCursor>Your content</CustomCursor>

Загрузите изображение в Roblox, замените YOUR_ASSET_ID и вставьте LocalScript.

-- Roblox custom cursor
-- Image URL: https://cute-cursor.com/cdn/packs/603/arrow.png
-- Hotspot: 49, 0
-- Size: 128x128
-- 1. Upload the image to Roblox and copy rbxassetid
-- 2. Replace YOUR_ASSET_ID below
-- 3. Put this LocalScript in StarterPlayer > StarterPlayerScripts

local UserInputService = game:GetService("UserInputService")
local RunService = game:GetService("RunService")
local Players = game:GetService("Players")

local player = Players.LocalPlayer
local playerGui = player:WaitForChild("PlayerGui")

local HOTSPOT_X = 49
local HOTSPOT_Y = 0
local CURSOR_WIDTH = 128
local CURSOR_HEIGHT = 128

local screenGui = Instance.new("ScreenGui")
screenGui.Name = "CustomCursorGui"
screenGui.ResetOnSpawn = false
screenGui.IgnoreGuiInset = true
screenGui.DisplayOrder = 999999
screenGui.Parent = playerGui

local cursor = Instance.new("ImageLabel")
cursor.Name = "CustomCursor"
cursor.BackgroundTransparency = 1
cursor.Size = UDim2.fromOffset(CURSOR_WIDTH, CURSOR_HEIGHT)
cursor.Image = "rbxassetid://YOUR_ASSET_ID"
cursor.ZIndex = 999999
cursor.Parent = screenGui

UserInputService.MouseIconEnabled = false

RunService.RenderStepped:Connect(function()
    local mouseLocation = UserInputService:GetMouseLocation()
    cursor.Position = UDim2.fromOffset(mouseLocation.X - HOTSPOT_X, mouseLocation.Y - HOTSPOT_Y)
end)
Указатель - 2 - cute-cursor.com

Указатель

Скачайте файл или скопируйте код для сайта, React, JavaScript или Roblox.

Вставьте этот CSS в стили. Координаты hotspot уже указаны.

.custom-pointer {
  cursor: url('https://cute-cursor.com/cdn/packs/603/hand.png') 27 0, pointer;
}

Вставьте этот JavaScript, чтобы применить курсор с правильным hotspot.

const CURSOR_URL = 'https://cute-cursor.com/cdn/packs/603/hand.png';
const HOTSPOT_X = 27;
const HOTSPOT_Y = 0;
const CURSOR_FALLBACK = 'pointer';

const cursorValue = `url('${CURSOR_URL}') ${HOTSPOT_X} ${HOTSPOT_Y}, ${CURSOR_FALLBACK}`;

// Apply to the whole page
document.body.style.cursor = cursorValue;

// Or apply to a specific element
// const target = document.querySelector('.my-element');
// if (target) target.style.cursor = cursorValue;

Скопируйте React-компонент и оберните им нужный контент.

import React from 'react';

const CURSOR_URL = 'https://cute-cursor.com/cdn/packs/603/hand.png';
const HOTSPOT_X = 27;
const HOTSPOT_Y = 0;
const CURSOR_FALLBACK = 'pointer';

export default function CustomPointer({ children, className = '', as: Tag = 'div', style = {}, ...props }) {
  const cursorStyle = {
    cursor: `url('${CURSOR_URL}') ${HOTSPOT_X} ${HOTSPOT_Y}, ${CURSOR_FALLBACK}`,
    ...style,
  };

  return (
    <Tag className={className} style={cursorStyle} {...props}>
      {children}
    </Tag>
  );
}

// Usage:
// <CustomPointer>Your content</CustomPointer>

Загрузите изображение в Roblox, замените YOUR_ASSET_ID и вставьте LocalScript.

-- Roblox custom cursor
-- Image URL: https://cute-cursor.com/cdn/packs/603/hand.png
-- Hotspot: 27, 0
-- Size: 128x128
-- 1. Upload the image to Roblox and copy rbxassetid
-- 2. Replace YOUR_ASSET_ID below
-- 3. Put this LocalScript in StarterPlayer > StarterPlayerScripts

local UserInputService = game:GetService("UserInputService")
local RunService = game:GetService("RunService")
local Players = game:GetService("Players")

local player = Players.LocalPlayer
local playerGui = player:WaitForChild("PlayerGui")

local HOTSPOT_X = 27
local HOTSPOT_Y = 0
local CURSOR_WIDTH = 128
local CURSOR_HEIGHT = 128

local screenGui = Instance.new("ScreenGui")
screenGui.Name = "CustomCursorGui"
screenGui.ResetOnSpawn = false
screenGui.IgnoreGuiInset = true
screenGui.DisplayOrder = 999999
screenGui.Parent = playerGui

local cursor = Instance.new("ImageLabel")
cursor.Name = "CustomCursor"
cursor.BackgroundTransparency = 1
cursor.Size = UDim2.fromOffset(CURSOR_WIDTH, CURSOR_HEIGHT)
cursor.Image = "rbxassetid://YOUR_ASSET_ID"
cursor.ZIndex = 999999
cursor.Parent = screenGui

UserInputService.MouseIconEnabled = false

RunService.RenderStepped:Connect(function()
    local mouseLocation = UserInputService:GetMouseLocation()
    cursor.Position = UDim2.fromOffset(mouseLocation.X - HOTSPOT_X, mouseLocation.Y - HOTSPOT_Y)
end)
Бесплатно

Get the Cursor Changer extension

Бесплатно для Chrome. Установите расширение и нажимайте «Добавить» у любого курсора.

Установить в Chrome