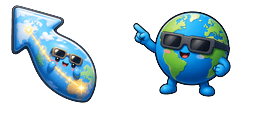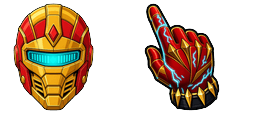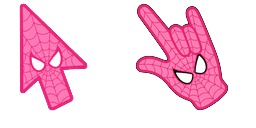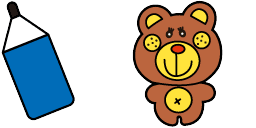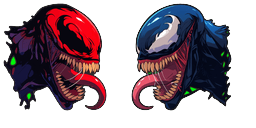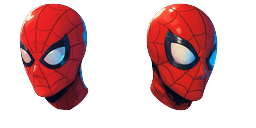
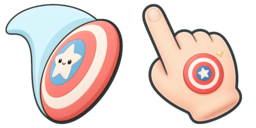
Cursor preview: Star Shield Buddy - 1 - cute-cursor.com

Cursor pack

Star Shield Buddy

Marvel AvengersAdded 2 times

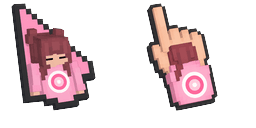
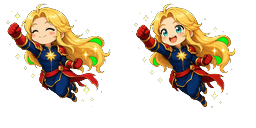
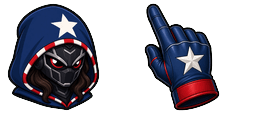
Star Shield Buddy is a cute custom cursor: a smiling star-shield with a soft blue trail, plus a matching pointing hand.

Add to Extension

Star Shield Buddy Custom Cursor Pack

Star Shield Buddy is a kawaii remake inspired by classic star-shield hero cursors: a chubby round shield with soft coral and cream rings, a sky-blue center, and a smiling star face riding a pale blue motion trail. The hover state is a plump pointing hand with a tiny star-shield badge on the back.

It works as a custom cursor in Chrome and Edge on Windows 10 and Windows 11. Download the pack on this page and both the arrow and the hand are ready to use.
Fan-made cute cursor art inspired by popular hero shield icons; not affiliated with or endorsed by Marvel or any trademark owners.

Browse more sets in the Marvel Avengers collection, or open Star Shield Buddy directly.

Cursor files

Download the file or copy ready-to-use CSS, JavaScript, React, and Roblox code with the correct hotspot.

Cursor - 1 - cute-cursor.com

Cursor

Download the file or copy embed code for your website, React, JavaScript, or Roblox.

Paste this CSS into your stylesheet. Hotspot coordinates are already included.

.custom-cursor {
  cursor: url('https://cute-cursor.com/cdn/packs/146321/arrow.png') 15 15, auto;
}

Paste this JavaScript to apply the cursor with the correct hotspot.

const CURSOR_URL = 'https://cute-cursor.com/cdn/packs/146321/arrow.png';
const HOTSPOT_X = 15;
const HOTSPOT_Y = 15;
const CURSOR_FALLBACK = 'auto';

const cursorValue = `url('${CURSOR_URL}') ${HOTSPOT_X} ${HOTSPOT_Y}, ${CURSOR_FALLBACK}`;

// Apply to the whole page
document.body.style.cursor = cursorValue;

// Or apply to a specific element
// const target = document.querySelector('.my-element');
// if (target) target.style.cursor = cursorValue;

Copy this React component and wrap your content with it.

import React from 'react';

const CURSOR_URL = 'https://cute-cursor.com/cdn/packs/146321/arrow.png';
const HOTSPOT_X = 15;
const HOTSPOT_Y = 15;
const CURSOR_FALLBACK = 'auto';

export default function CustomCursor({ children, className = '', as: Tag = 'div', style = {}, ...props }) {
  const cursorStyle = {
    cursor: `url('${CURSOR_URL}') ${HOTSPOT_X} ${HOTSPOT_Y}, ${CURSOR_FALLBACK}`,
    ...style,
  };

  return (
    <Tag className={className} style={cursorStyle} {...props}>
      {children}
    </Tag>
  );
}

// Usage:
// <CustomCursor>Your content</CustomCursor>

Upload the image to Roblox, replace YOUR_ASSET_ID, then paste this LocalScript.

-- Roblox custom cursor
-- Image URL: https://cute-cursor.com/cdn/packs/146321/arrow.png
-- Hotspot: 15, 15
-- Size: 128x128
-- 1. Upload the image to Roblox and copy rbxassetid
-- 2. Replace YOUR_ASSET_ID below
-- 3. Put this LocalScript in StarterPlayer > StarterPlayerScripts

local UserInputService = game:GetService("UserInputService")
local RunService = game:GetService("RunService")
local Players = game:GetService("Players")

local player = Players.LocalPlayer
local playerGui = player:WaitForChild("PlayerGui")

local HOTSPOT_X = 15
local HOTSPOT_Y = 15
local CURSOR_WIDTH = 128
local CURSOR_HEIGHT = 128

local screenGui = Instance.new("ScreenGui")
screenGui.Name = "CustomCursorGui"
screenGui.ResetOnSpawn = false
screenGui.IgnoreGuiInset = true
screenGui.DisplayOrder = 999999
screenGui.Parent = playerGui

local cursor = Instance.new("ImageLabel")
cursor.Name = "CustomCursor"
cursor.BackgroundTransparency = 1
cursor.Size = UDim2.fromOffset(CURSOR_WIDTH, CURSOR_HEIGHT)
cursor.Image = "rbxassetid://YOUR_ASSET_ID"
cursor.ZIndex = 999999
cursor.Parent = screenGui

UserInputService.MouseIconEnabled = false

RunService.RenderStepped:Connect(function()
    local mouseLocation = UserInputService:GetMouseLocation()
    cursor.Position = UDim2.fromOffset(mouseLocation.X - HOTSPOT_X, mouseLocation.Y - HOTSPOT_Y)
end)
Pointer - 2 - cute-cursor.com

Pointer

Download the file or copy embed code for your website, React, JavaScript, or Roblox.

Paste this CSS into your stylesheet. Hotspot coordinates are already included.

.custom-pointer {
  cursor: url('https://cute-cursor.com/cdn/packs/146321/hand.png') 19 6, pointer;
}

Paste this JavaScript to apply the cursor with the correct hotspot.

const CURSOR_URL = 'https://cute-cursor.com/cdn/packs/146321/hand.png';
const HOTSPOT_X = 19;
const HOTSPOT_Y = 6;
const CURSOR_FALLBACK = 'pointer';

const cursorValue = `url('${CURSOR_URL}') ${HOTSPOT_X} ${HOTSPOT_Y}, ${CURSOR_FALLBACK}`;

// Apply to the whole page
document.body.style.cursor = cursorValue;

// Or apply to a specific element
// const target = document.querySelector('.my-element');
// if (target) target.style.cursor = cursorValue;

Copy this React component and wrap your content with it.

import React from 'react';

const CURSOR_URL = 'https://cute-cursor.com/cdn/packs/146321/hand.png';
const HOTSPOT_X = 19;
const HOTSPOT_Y = 6;
const CURSOR_FALLBACK = 'pointer';

export default function CustomPointer({ children, className = '', as: Tag = 'div', style = {}, ...props }) {
  const cursorStyle = {
    cursor: `url('${CURSOR_URL}') ${HOTSPOT_X} ${HOTSPOT_Y}, ${CURSOR_FALLBACK}`,
    ...style,
  };

  return (
    <Tag className={className} style={cursorStyle} {...props}>
      {children}
    </Tag>
  );
}

// Usage:
// <CustomPointer>Your content</CustomPointer>

Upload the image to Roblox, replace YOUR_ASSET_ID, then paste this LocalScript.

-- Roblox custom cursor
-- Image URL: https://cute-cursor.com/cdn/packs/146321/hand.png
-- Hotspot: 19, 6
-- Size: 128x128
-- 1. Upload the image to Roblox and copy rbxassetid
-- 2. Replace YOUR_ASSET_ID below
-- 3. Put this LocalScript in StarterPlayer > StarterPlayerScripts

local UserInputService = game:GetService("UserInputService")
local RunService = game:GetService("RunService")
local Players = game:GetService("Players")

local player = Players.LocalPlayer
local playerGui = player:WaitForChild("PlayerGui")

local HOTSPOT_X = 19
local HOTSPOT_Y = 6
local CURSOR_WIDTH = 128
local CURSOR_HEIGHT = 128

local screenGui = Instance.new("ScreenGui")
screenGui.Name = "CustomCursorGui"
screenGui.ResetOnSpawn = false
screenGui.IgnoreGuiInset = true
screenGui.DisplayOrder = 999999
screenGui.Parent = playerGui

local cursor = Instance.new("ImageLabel")
cursor.Name = "CustomCursor"
cursor.BackgroundTransparency = 1
cursor.Size = UDim2.fromOffset(CURSOR_WIDTH, CURSOR_HEIGHT)
cursor.Image = "rbxassetid://YOUR_ASSET_ID"
cursor.ZIndex = 999999
cursor.Parent = screenGui

UserInputService.MouseIconEnabled = false

RunService.RenderStepped:Connect(function()
    local mouseLocation = UserInputService:GetMouseLocation()
    cursor.Position = UDim2.fromOffset(mouseLocation.X - HOTSPOT_X, mouseLocation.Y - HOTSPOT_Y)
end)
100% Free

Get the Cursor Changer extension

Free for Chrome. Install once, then click Add on any cursor you like.

Install to Chrome