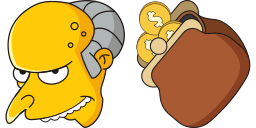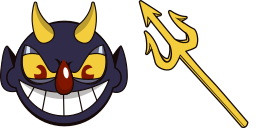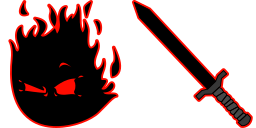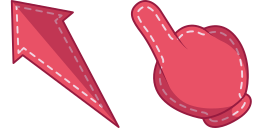
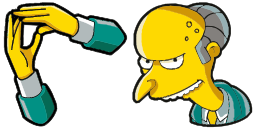
Cursor preview: Charles Montgomery - 1 - cute-cursor.com

Cursor pack

Charles Montgomery

The SimpsonsAdded 247 times

Browse with Charles Montgomery - a Chrome cursor featuring animatronic horror pointer and jumpscare hover. FNAF fan art pack.

Add to Extension

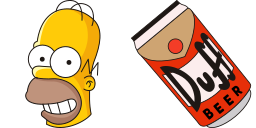
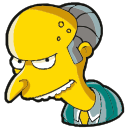
The Charles Montgomery cursor is part of The Simpsons Cursor Collection for browsers. It features Montgomery Burns, the wealthy and despotic owner of the Springfield Nuclear Power Plant. The cursor shows him with a devilish grin on his face, ready to execute his next evil plan. The Simpsons Cursor Collection offers a range of different characters from the beloved animated television show, allowing fans to customize their browsing experience with their favorite character. The collection is easy to install and adds a fun touch to any computer or laptop.
Cursor files

Download the file or copy ready-to-use CSS, JavaScript, React, and Roblox code with the correct hotspot.
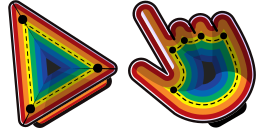
Cursor - 1 - cute-cursor.com

Cursor

Download the file or copy embed code for your website, React, JavaScript, or Roblox.

Paste this CSS into your stylesheet. Hotspot coordinates are already included.

.custom-cursor {
  cursor: url('https://cute-cursor.com/cdn/packs/10742/arrow.png') 6 4, auto;
}

Paste this JavaScript to apply the cursor with the correct hotspot.

const CURSOR_URL = 'https://cute-cursor.com/cdn/packs/10742/arrow.png';
const HOTSPOT_X = 6;
const HOTSPOT_Y = 4;
const CURSOR_FALLBACK = 'auto';

const cursorValue = `url('${CURSOR_URL}') ${HOTSPOT_X} ${HOTSPOT_Y}, ${CURSOR_FALLBACK}`;

// Apply to the whole page
document.body.style.cursor = cursorValue;

// Or apply to a specific element
// const target = document.querySelector('.my-element');
// if (target) target.style.cursor = cursorValue;

Copy this React component and wrap your content with it.

import React from 'react';

const CURSOR_URL = 'https://cute-cursor.com/cdn/packs/10742/arrow.png';
const HOTSPOT_X = 6;
const HOTSPOT_Y = 4;
const CURSOR_FALLBACK = 'auto';

export default function CustomCursor({ children, className = '', as: Tag = 'div', style = {}, ...props }) {
  const cursorStyle = {
    cursor: `url('${CURSOR_URL}') ${HOTSPOT_X} ${HOTSPOT_Y}, ${CURSOR_FALLBACK}`,
    ...style,
  };

  return (
    <Tag className={className} style={cursorStyle} {...props}>
      {children}
    </Tag>
  );
}

// Usage:
// <CustomCursor>Your content</CustomCursor>

Upload the image to Roblox, replace YOUR_ASSET_ID, then paste this LocalScript.

-- Roblox custom cursor
-- Image URL: https://cute-cursor.com/cdn/packs/10742/arrow.png
-- Hotspot: 6, 4
-- Size: 128x128
-- 1. Upload the image to Roblox and copy rbxassetid
-- 2. Replace YOUR_ASSET_ID below
-- 3. Put this LocalScript in StarterPlayer > StarterPlayerScripts

local UserInputService = game:GetService("UserInputService")
local RunService = game:GetService("RunService")
local Players = game:GetService("Players")

local player = Players.LocalPlayer
local playerGui = player:WaitForChild("PlayerGui")

local HOTSPOT_X = 6
local HOTSPOT_Y = 4
local CURSOR_WIDTH = 128
local CURSOR_HEIGHT = 128

local screenGui = Instance.new("ScreenGui")
screenGui.Name = "CustomCursorGui"
screenGui.ResetOnSpawn = false
screenGui.IgnoreGuiInset = true
screenGui.DisplayOrder = 999999
screenGui.Parent = playerGui

local cursor = Instance.new("ImageLabel")
cursor.Name = "CustomCursor"
cursor.BackgroundTransparency = 1
cursor.Size = UDim2.fromOffset(CURSOR_WIDTH, CURSOR_HEIGHT)
cursor.Image = "rbxassetid://YOUR_ASSET_ID"
cursor.ZIndex = 999999
cursor.Parent = screenGui

UserInputService.MouseIconEnabled = false

RunService.RenderStepped:Connect(function()
    local mouseLocation = UserInputService:GetMouseLocation()
    cursor.Position = UDim2.fromOffset(mouseLocation.X - HOTSPOT_X, mouseLocation.Y - HOTSPOT_Y)
end)
Pointer - 2 - cute-cursor.com

Pointer

Download the file or copy embed code for your website, React, JavaScript, or Roblox.

Paste this CSS into your stylesheet. Hotspot coordinates are already included.

.custom-pointer {
  cursor: url('https://cute-cursor.com/cdn/packs/10742/hand.png') 21 3, pointer;
}

Paste this JavaScript to apply the cursor with the correct hotspot.

const CURSOR_URL = 'https://cute-cursor.com/cdn/packs/10742/hand.png';
const HOTSPOT_X = 21;
const HOTSPOT_Y = 3;
const CURSOR_FALLBACK = 'pointer';

const cursorValue = `url('${CURSOR_URL}') ${HOTSPOT_X} ${HOTSPOT_Y}, ${CURSOR_FALLBACK}`;

// Apply to the whole page
document.body.style.cursor = cursorValue;

// Or apply to a specific element
// const target = document.querySelector('.my-element');
// if (target) target.style.cursor = cursorValue;

Copy this React component and wrap your content with it.

import React from 'react';

const CURSOR_URL = 'https://cute-cursor.com/cdn/packs/10742/hand.png';
const HOTSPOT_X = 21;
const HOTSPOT_Y = 3;
const CURSOR_FALLBACK = 'pointer';

export default function CustomPointer({ children, className = '', as: Tag = 'div', style = {}, ...props }) {
  const cursorStyle = {
    cursor: `url('${CURSOR_URL}') ${HOTSPOT_X} ${HOTSPOT_Y}, ${CURSOR_FALLBACK}`,
    ...style,
  };

  return (
    <Tag className={className} style={cursorStyle} {...props}>
      {children}
    </Tag>
  );
}

// Usage:
// <CustomPointer>Your content</CustomPointer>

Upload the image to Roblox, replace YOUR_ASSET_ID, then paste this LocalScript.

-- Roblox custom cursor
-- Image URL: https://cute-cursor.com/cdn/packs/10742/hand.png
-- Hotspot: 21, 3
-- Size: 128x128
-- 1. Upload the image to Roblox and copy rbxassetid
-- 2. Replace YOUR_ASSET_ID below
-- 3. Put this LocalScript in StarterPlayer > StarterPlayerScripts

local UserInputService = game:GetService("UserInputService")
local RunService = game:GetService("RunService")
local Players = game:GetService("Players")

local player = Players.LocalPlayer
local playerGui = player:WaitForChild("PlayerGui")

local HOTSPOT_X = 21
local HOTSPOT_Y = 3
local CURSOR_WIDTH = 128
local CURSOR_HEIGHT = 128

local screenGui = Instance.new("ScreenGui")
screenGui.Name = "CustomCursorGui"
screenGui.ResetOnSpawn = false
screenGui.IgnoreGuiInset = true
screenGui.DisplayOrder = 999999
screenGui.Parent = playerGui

local cursor = Instance.new("ImageLabel")
cursor.Name = "CustomCursor"
cursor.BackgroundTransparency = 1
cursor.Size = UDim2.fromOffset(CURSOR_WIDTH, CURSOR_HEIGHT)
cursor.Image = "rbxassetid://YOUR_ASSET_ID"
cursor.ZIndex = 999999
cursor.Parent = screenGui

UserInputService.MouseIconEnabled = false

RunService.RenderStepped:Connect(function()
    local mouseLocation = UserInputService:GetMouseLocation()
    cursor.Position = UDim2.fromOffset(mouseLocation.X - HOTSPOT_X, mouseLocation.Y - HOTSPOT_Y)
end)
100% Free

Get the Cursor Changer extension

Free for Chrome. Install once, then click Add on any cursor you like.

Install to Chrome