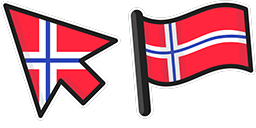

Podgląd kursora: Thailand - 1 - cute-cursor.com

Paczka kursorów

Thailand

FlagsDodano 193 razy

Thailand cursor for Chrome - Thailand flag pointer with patriotic hover hand. Country fan art pack.

Dodaj do rozszerzenia

Looking for a unique and stylish way to add a touch of Thailand to your browsing experience? The Thailand cursor from Flags Cursor Collection is just the thing you need! Featuring the iconic red, white, and blue colors of the Thai national flag, this cursor is both eye-catching and functional. Whether you're planning your next trip to Thailand or simply want to show your love for this beautiful country, the Thailand cursor is a must-have addition to your browser. So why wait? Download it today and start exploring the web in style!

Pliki kursora

Pobierz plik lub skopiuj gotowy do użycia kod CSS, JavaScript, React i Roblox z poprawnym punktem aktywnym.

Kursor - 1 - cute-cursor.com

Kursor

Pobierz plik lub skopiuj kod osadzania dla swojej strony, React, JavaScript lub Roblox.

Wklej ten kod CSS do swojego arkusza stylów. Współrzędne punktu aktywnego są już uwzględnione.

.custom-cursor {
  cursor: url('https://cute-cursor.com/cdn/packs/10300/arrow.png') 3 2, auto;
}

Wklej ten kod JavaScript, aby zastosować kursor z poprawnym punktem aktywnym.

const CURSOR_URL = 'https://cute-cursor.com/cdn/packs/10300/arrow.png';
const HOTSPOT_X = 3;
const HOTSPOT_Y = 2;
const CURSOR_FALLBACK = 'auto';

const cursorValue = `url('${CURSOR_URL}') ${HOTSPOT_X} ${HOTSPOT_Y}, ${CURSOR_FALLBACK}`;

// Apply to the whole page
document.body.style.cursor = cursorValue;

// Or apply to a specific element
// const target = document.querySelector('.my-element');
// if (target) target.style.cursor = cursorValue;

Skopiuj ten komponent React i opakuj nim swoją zawartość.

import React from 'react';

const CURSOR_URL = 'https://cute-cursor.com/cdn/packs/10300/arrow.png';
const HOTSPOT_X = 3;
const HOTSPOT_Y = 2;
const CURSOR_FALLBACK = 'auto';

export default function CustomCursor({ children, className = '', as: Tag = 'div', style = {}, ...props }) {
  const cursorStyle = {
    cursor: `url('${CURSOR_URL}') ${HOTSPOT_X} ${HOTSPOT_Y}, ${CURSOR_FALLBACK}`,
    ...style,
  };

  return (
    <Tag className={className} style={cursorStyle} {...props}>
      {children}
    </Tag>
  );
}

// Usage:
// <CustomCursor>Your content</CustomCursor>

Prześlij obraz do Roblox, zastąp YOUR_ASSET_ID, a następnie wklej ten LocalScript.

-- Roblox custom cursor
-- Image URL: https://cute-cursor.com/cdn/packs/10300/arrow.png
-- Hotspot: 3, 2
-- Size: 128x128
-- 1. Upload the image to Roblox and copy rbxassetid
-- 2. Replace YOUR_ASSET_ID below
-- 3. Put this LocalScript in StarterPlayer > StarterPlayerScripts

local UserInputService = game:GetService("UserInputService")
local RunService = game:GetService("RunService")
local Players = game:GetService("Players")

local player = Players.LocalPlayer
local playerGui = player:WaitForChild("PlayerGui")

local HOTSPOT_X = 3
local HOTSPOT_Y = 2
local CURSOR_WIDTH = 128
local CURSOR_HEIGHT = 128

local screenGui = Instance.new("ScreenGui")
screenGui.Name = "CustomCursorGui"
screenGui.ResetOnSpawn = false
screenGui.IgnoreGuiInset = true
screenGui.DisplayOrder = 999999
screenGui.Parent = playerGui

local cursor = Instance.new("ImageLabel")
cursor.Name = "CustomCursor"
cursor.BackgroundTransparency = 1
cursor.Size = UDim2.fromOffset(CURSOR_WIDTH, CURSOR_HEIGHT)
cursor.Image = "rbxassetid://YOUR_ASSET_ID"
cursor.ZIndex = 999999
cursor.Parent = screenGui

UserInputService.MouseIconEnabled = false

RunService.RenderStepped:Connect(function()
    local mouseLocation = UserInputService:GetMouseLocation()
    cursor.Position = UDim2.fromOffset(mouseLocation.X - HOTSPOT_X, mouseLocation.Y - HOTSPOT_Y)
end)
Wskaźnik - 2 - cute-cursor.com

Wskaźnik

Pobierz plik lub skopiuj kod osadzania dla swojej strony, React, JavaScript lub Roblox.

Wklej ten kod CSS do swojego arkusza stylów. Współrzędne punktu aktywnego są już uwzględnione.

.custom-pointer {
  cursor: url('https://cute-cursor.com/cdn/packs/10300/hand.png') 33 4, pointer;
}

Wklej ten kod JavaScript, aby zastosować kursor z poprawnym punktem aktywnym.

const CURSOR_URL = 'https://cute-cursor.com/cdn/packs/10300/hand.png';
const HOTSPOT_X = 33;
const HOTSPOT_Y = 4;
const CURSOR_FALLBACK = 'pointer';

const cursorValue = `url('${CURSOR_URL}') ${HOTSPOT_X} ${HOTSPOT_Y}, ${CURSOR_FALLBACK}`;

// Apply to the whole page
document.body.style.cursor = cursorValue;

// Or apply to a specific element
// const target = document.querySelector('.my-element');
// if (target) target.style.cursor = cursorValue;

Skopiuj ten komponent React i opakuj nim swoją zawartość.

import React from 'react';

const CURSOR_URL = 'https://cute-cursor.com/cdn/packs/10300/hand.png';
const HOTSPOT_X = 33;
const HOTSPOT_Y = 4;
const CURSOR_FALLBACK = 'pointer';

export default function CustomPointer({ children, className = '', as: Tag = 'div', style = {}, ...props }) {
  const cursorStyle = {
    cursor: `url('${CURSOR_URL}') ${HOTSPOT_X} ${HOTSPOT_Y}, ${CURSOR_FALLBACK}`,
    ...style,
  };

  return (
    <Tag className={className} style={cursorStyle} {...props}>
      {children}
    </Tag>
  );
}

// Usage:
// <CustomPointer>Your content</CustomPointer>

Prześlij obraz do Roblox, zastąp YOUR_ASSET_ID, a następnie wklej ten LocalScript.

-- Roblox custom cursor
-- Image URL: https://cute-cursor.com/cdn/packs/10300/hand.png
-- Hotspot: 33, 4
-- Size: 128x128
-- 1. Upload the image to Roblox and copy rbxassetid
-- 2. Replace YOUR_ASSET_ID below
-- 3. Put this LocalScript in StarterPlayer > StarterPlayerScripts

local UserInputService = game:GetService("UserInputService")
local RunService = game:GetService("RunService")
local Players = game:GetService("Players")

local player = Players.LocalPlayer
local playerGui = player:WaitForChild("PlayerGui")

local HOTSPOT_X = 33
local HOTSPOT_Y = 4
local CURSOR_WIDTH = 128
local CURSOR_HEIGHT = 128

local screenGui = Instance.new("ScreenGui")
screenGui.Name = "CustomCursorGui"
screenGui.ResetOnSpawn = false
screenGui.IgnoreGuiInset = true
screenGui.DisplayOrder = 999999
screenGui.Parent = playerGui

local cursor = Instance.new("ImageLabel")
cursor.Name = "CustomCursor"
cursor.BackgroundTransparency = 1
cursor.Size = UDim2.fromOffset(CURSOR_WIDTH, CURSOR_HEIGHT)
cursor.Image = "rbxassetid://YOUR_ASSET_ID"
cursor.ZIndex = 999999
cursor.Parent = screenGui

UserInputService.MouseIconEnabled = false

RunService.RenderStepped:Connect(function()
    local mouseLocation = UserInputService:GetMouseLocation()
    cursor.Position = UDim2.fromOffset(mouseLocation.X - HOTSPOT_X, mouseLocation.Y - HOTSPOT_Y)
end)
100% za darmo

Pobierz rozszerzenie Cursor Changer

Darmowy dla Chrome. Zainstaluj raz, a następnie kliknij Dodaj przy dowolnym kursorze, który Ci się podoba.

Zainstaluj w Chrome