Cursor preview: Gravity Falls - 1 - cute-cursor.com

Cursor pack

Gravity Falls

gravity fallsAdded 298 times

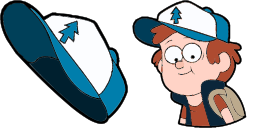
Gravity Falls cursor pack for Chrome - gaming themed default pointer and player hand hover. Video game fan art.

Add to Extension

Looking for a cool way to customize your browser? Check out the Gravity Falls cursor from the Cartoons Cursor Collection! This animated cursor features the iconic pine tree symbol from the hit television show, adding a touch of whimsy and fun to your browsing experience. With its smooth animation and high-quality design, the Gravity Falls cursor is the perfect choice for fans of the show or anyone looking to add some personality to their computer. So why wait? Download the Gravity Falls cursor today and start browsing with style!

Cursor files

Download the file or copy ready-to-use CSS, JavaScript, React, and Roblox code with the correct hotspot.

Cursor - 1 - cute-cursor.com

Cursor

Download the file or copy embed code for your website, React, JavaScript, or Roblox.

Paste this CSS into your stylesheet. Hotspot coordinates are already included.

.custom-cursor {
  cursor: url('https://cute-cursor.com/cdn/packs/10128/arrow.png') 3 4, auto;
}

Paste this JavaScript to apply the cursor with the correct hotspot.

const CURSOR_URL = 'https://cute-cursor.com/cdn/packs/10128/arrow.png';
const HOTSPOT_X = 3;
const HOTSPOT_Y = 4;
const CURSOR_FALLBACK = 'auto';

const cursorValue = `url('${CURSOR_URL}') ${HOTSPOT_X} ${HOTSPOT_Y}, ${CURSOR_FALLBACK}`;

// Apply to the whole page
document.body.style.cursor = cursorValue;

// Or apply to a specific element
// const target = document.querySelector('.my-element');
// if (target) target.style.cursor = cursorValue;

Copy this React component and wrap your content with it.

import React from 'react';

const CURSOR_URL = 'https://cute-cursor.com/cdn/packs/10128/arrow.png';
const HOTSPOT_X = 3;
const HOTSPOT_Y = 4;
const CURSOR_FALLBACK = 'auto';

export default function CustomCursor({ children, className = '', as: Tag = 'div', style = {}, ...props }) {
  const cursorStyle = {
    cursor: `url('${CURSOR_URL}') ${HOTSPOT_X} ${HOTSPOT_Y}, ${CURSOR_FALLBACK}`,
    ...style,
  };

  return (
    <Tag className={className} style={cursorStyle} {...props}>
      {children}
    </Tag>
  );
}

// Usage:
// <CustomCursor>Your content</CustomCursor>

Upload the image to Roblox, replace YOUR_ASSET_ID, then paste this LocalScript.

-- Roblox custom cursor
-- Image URL: https://cute-cursor.com/cdn/packs/10128/arrow.png
-- Hotspot: 3, 4
-- Size: 128x128
-- 1. Upload the image to Roblox and copy rbxassetid
-- 2. Replace YOUR_ASSET_ID below
-- 3. Put this LocalScript in StarterPlayer > StarterPlayerScripts

local UserInputService = game:GetService("UserInputService")
local RunService = game:GetService("RunService")
local Players = game:GetService("Players")

local player = Players.LocalPlayer
local playerGui = player:WaitForChild("PlayerGui")

local HOTSPOT_X = 3
local HOTSPOT_Y = 4
local CURSOR_WIDTH = 128
local CURSOR_HEIGHT = 128

local screenGui = Instance.new("ScreenGui")
screenGui.Name = "CustomCursorGui"
screenGui.ResetOnSpawn = false
screenGui.IgnoreGuiInset = true
screenGui.DisplayOrder = 999999
screenGui.Parent = playerGui

local cursor = Instance.new("ImageLabel")
cursor.Name = "CustomCursor"
cursor.BackgroundTransparency = 1
cursor.Size = UDim2.fromOffset(CURSOR_WIDTH, CURSOR_HEIGHT)
cursor.Image = "rbxassetid://YOUR_ASSET_ID"
cursor.ZIndex = 999999
cursor.Parent = screenGui

UserInputService.MouseIconEnabled = false

RunService.RenderStepped:Connect(function()
    local mouseLocation = UserInputService:GetMouseLocation()
    cursor.Position = UDim2.fromOffset(mouseLocation.X - HOTSPOT_X, mouseLocation.Y - HOTSPOT_Y)
end)
Pointer - 2 - cute-cursor.com

Pointer

Download the file or copy embed code for your website, React, JavaScript, or Roblox.

Paste this CSS into your stylesheet. Hotspot coordinates are already included.

.custom-pointer {
  cursor: url('https://cute-cursor.com/cdn/packs/10128/hand.png') 31 3, pointer;
}

Paste this JavaScript to apply the cursor with the correct hotspot.

const CURSOR_URL = 'https://cute-cursor.com/cdn/packs/10128/hand.png';
const HOTSPOT_X = 31;
const HOTSPOT_Y = 3;
const CURSOR_FALLBACK = 'pointer';

const cursorValue = `url('${CURSOR_URL}') ${HOTSPOT_X} ${HOTSPOT_Y}, ${CURSOR_FALLBACK}`;

// Apply to the whole page
document.body.style.cursor = cursorValue;

// Or apply to a specific element
// const target = document.querySelector('.my-element');
// if (target) target.style.cursor = cursorValue;

Copy this React component and wrap your content with it.

import React from 'react';

const CURSOR_URL = 'https://cute-cursor.com/cdn/packs/10128/hand.png';
const HOTSPOT_X = 31;
const HOTSPOT_Y = 3;
const CURSOR_FALLBACK = 'pointer';

export default function CustomPointer({ children, className = '', as: Tag = 'div', style = {}, ...props }) {
  const cursorStyle = {
    cursor: `url('${CURSOR_URL}') ${HOTSPOT_X} ${HOTSPOT_Y}, ${CURSOR_FALLBACK}`,
    ...style,
  };

  return (
    <Tag className={className} style={cursorStyle} {...props}>
      {children}
    </Tag>
  );
}

// Usage:
// <CustomPointer>Your content</CustomPointer>

Upload the image to Roblox, replace YOUR_ASSET_ID, then paste this LocalScript.

-- Roblox custom cursor
-- Image URL: https://cute-cursor.com/cdn/packs/10128/hand.png
-- Hotspot: 31, 3
-- Size: 128x128
-- 1. Upload the image to Roblox and copy rbxassetid
-- 2. Replace YOUR_ASSET_ID below
-- 3. Put this LocalScript in StarterPlayer > StarterPlayerScripts

local UserInputService = game:GetService("UserInputService")
local RunService = game:GetService("RunService")
local Players = game:GetService("Players")

local player = Players.LocalPlayer
local playerGui = player:WaitForChild("PlayerGui")

local HOTSPOT_X = 31
local HOTSPOT_Y = 3
local CURSOR_WIDTH = 128
local CURSOR_HEIGHT = 128

local screenGui = Instance.new("ScreenGui")
screenGui.Name = "CustomCursorGui"
screenGui.ResetOnSpawn = false
screenGui.IgnoreGuiInset = true
screenGui.DisplayOrder = 999999
screenGui.Parent = playerGui

local cursor = Instance.new("ImageLabel")
cursor.Name = "CustomCursor"
cursor.BackgroundTransparency = 1
cursor.Size = UDim2.fromOffset(CURSOR_WIDTH, CURSOR_HEIGHT)
cursor.Image = "rbxassetid://YOUR_ASSET_ID"
cursor.ZIndex = 999999
cursor.Parent = screenGui

UserInputService.MouseIconEnabled = false

RunService.RenderStepped:Connect(function()
    local mouseLocation = UserInputService:GetMouseLocation()
    cursor.Position = UDim2.fromOffset(mouseLocation.X - HOTSPOT_X, mouseLocation.Y - HOTSPOT_Y)
end)
100% Free

Get the Cursor Changer extension

Free for Chrome. Install once, then click Add on any cursor you like.

Install to Chrome