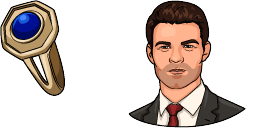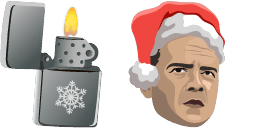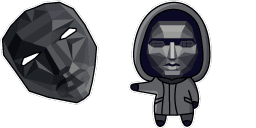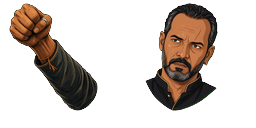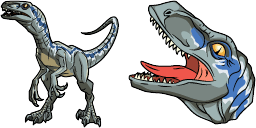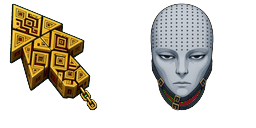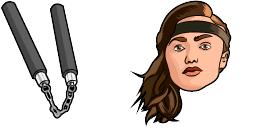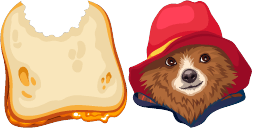
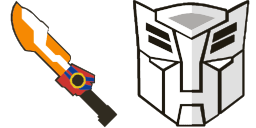
Anteprima cursore: Transformers - 1 - cute-cursor.com

Pack di cursori

Transformers

MoviesAggiunto 161 volte

Browse with Transformers - a Chrome cursor featuring themed custom pointer and matching hover. Chrome cursor fan art.

Aggiungi all'Estensione

The Transformers cursor is an exciting addition to the Movies Cursor Collection. With its dynamic design, it captures the power and energy of these iconic robots in disguise. As you navigate through your browser, this cursor will transform your experience and transport you to the action-packed world of the Autobots and Decepticons. Whether you're a fan of the original 1980s cartoon or the more recent live-action movies, this cursor is sure to spark your imagination and keep you engaged for hours. So get ready to roll out with the Transformers cursor from the Movies Cursor Collection.

File del cursore

Scarica il file o copia il codice CSS, JavaScript, React e Roblox pronto all'uso con l'hotspot corretto.

Cursore - 1 - cute-cursor.com

Cursore

Scarica il file o copia il codice di incorporamento per il tuo sito web, React, JavaScript o Roblox.

Incolla questo CSS nel tuo foglio di stile. Le coordinate dell'hotspot sono già incluse.

.custom-cursor {
  cursor: url('https://cute-cursor.com/cdn/packs/10165/arrow.png') 8 2, auto;
}

Incolla questo JavaScript per applicare il cursore con l'hotspot corretto.

const CURSOR_URL = 'https://cute-cursor.com/cdn/packs/10165/arrow.png';
const HOTSPOT_X = 8;
const HOTSPOT_Y = 2;
const CURSOR_FALLBACK = 'auto';

const cursorValue = `url('${CURSOR_URL}') ${HOTSPOT_X} ${HOTSPOT_Y}, ${CURSOR_FALLBACK}`;

// Apply to the whole page
document.body.style.cursor = cursorValue;

// Or apply to a specific element
// const target = document.querySelector('.my-element');
// if (target) target.style.cursor = cursorValue;

Copia questo componente React e avvolgi il tuo contenuto con esso.

import React from 'react';

const CURSOR_URL = 'https://cute-cursor.com/cdn/packs/10165/arrow.png';
const HOTSPOT_X = 8;
const HOTSPOT_Y = 2;
const CURSOR_FALLBACK = 'auto';

export default function CustomCursor({ children, className = '', as: Tag = 'div', style = {}, ...props }) {
  const cursorStyle = {
    cursor: `url('${CURSOR_URL}') ${HOTSPOT_X} ${HOTSPOT_Y}, ${CURSOR_FALLBACK}`,
    ...style,
  };

  return (
    <Tag className={className} style={cursorStyle} {...props}>
      {children}
    </Tag>
  );
}

// Usage:
// <CustomCursor>Your content</CustomCursor>

Carica l'immagine su Roblox, sostituisci YOUR_ASSET_ID, quindi incolla questo LocalScript.

-- Roblox custom cursor
-- Image URL: https://cute-cursor.com/cdn/packs/10165/arrow.png
-- Hotspot: 8, 2
-- Size: 128x128
-- 1. Upload the image to Roblox and copy rbxassetid
-- 2. Replace YOUR_ASSET_ID below
-- 3. Put this LocalScript in StarterPlayer > StarterPlayerScripts

local UserInputService = game:GetService("UserInputService")
local RunService = game:GetService("RunService")
local Players = game:GetService("Players")

local player = Players.LocalPlayer
local playerGui = player:WaitForChild("PlayerGui")

local HOTSPOT_X = 8
local HOTSPOT_Y = 2
local CURSOR_WIDTH = 128
local CURSOR_HEIGHT = 128

local screenGui = Instance.new("ScreenGui")
screenGui.Name = "CustomCursorGui"
screenGui.ResetOnSpawn = false
screenGui.IgnoreGuiInset = true
screenGui.DisplayOrder = 999999
screenGui.Parent = playerGui

local cursor = Instance.new("ImageLabel")
cursor.Name = "CustomCursor"
cursor.BackgroundTransparency = 1
cursor.Size = UDim2.fromOffset(CURSOR_WIDTH, CURSOR_HEIGHT)
cursor.Image = "rbxassetid://YOUR_ASSET_ID"
cursor.ZIndex = 999999
cursor.Parent = screenGui

UserInputService.MouseIconEnabled = false

RunService.RenderStepped:Connect(function()
    local mouseLocation = UserInputService:GetMouseLocation()
    cursor.Position = UDim2.fromOffset(mouseLocation.X - HOTSPOT_X, mouseLocation.Y - HOTSPOT_Y)
end)
Puntatore - 2 - cute-cursor.com

Puntatore

Scarica il file o copia il codice di incorporamento per il tuo sito web, React, JavaScript o Roblox.

Incolla questo CSS nel tuo foglio di stile. Le coordinate dell'hotspot sono già incluse.

.custom-pointer {
  cursor: url('https://cute-cursor.com/cdn/packs/10165/hand.png') 31 1, pointer;
}

Incolla questo JavaScript per applicare il cursore con l'hotspot corretto.

const CURSOR_URL = 'https://cute-cursor.com/cdn/packs/10165/hand.png';
const HOTSPOT_X = 31;
const HOTSPOT_Y = 1;
const CURSOR_FALLBACK = 'pointer';

const cursorValue = `url('${CURSOR_URL}') ${HOTSPOT_X} ${HOTSPOT_Y}, ${CURSOR_FALLBACK}`;

// Apply to the whole page
document.body.style.cursor = cursorValue;

// Or apply to a specific element
// const target = document.querySelector('.my-element');
// if (target) target.style.cursor = cursorValue;

Copia questo componente React e avvolgi il tuo contenuto con esso.

import React from 'react';

const CURSOR_URL = 'https://cute-cursor.com/cdn/packs/10165/hand.png';
const HOTSPOT_X = 31;
const HOTSPOT_Y = 1;
const CURSOR_FALLBACK = 'pointer';

export default function CustomPointer({ children, className = '', as: Tag = 'div', style = {}, ...props }) {
  const cursorStyle = {
    cursor: `url('${CURSOR_URL}') ${HOTSPOT_X} ${HOTSPOT_Y}, ${CURSOR_FALLBACK}`,
    ...style,
  };

  return (
    <Tag className={className} style={cursorStyle} {...props}>
      {children}
    </Tag>
  );
}

// Usage:
// <CustomPointer>Your content</CustomPointer>

Carica l'immagine su Roblox, sostituisci YOUR_ASSET_ID, quindi incolla questo LocalScript.

-- Roblox custom cursor
-- Image URL: https://cute-cursor.com/cdn/packs/10165/hand.png
-- Hotspot: 31, 1
-- Size: 128x128
-- 1. Upload the image to Roblox and copy rbxassetid
-- 2. Replace YOUR_ASSET_ID below
-- 3. Put this LocalScript in StarterPlayer > StarterPlayerScripts

local UserInputService = game:GetService("UserInputService")
local RunService = game:GetService("RunService")
local Players = game:GetService("Players")

local player = Players.LocalPlayer
local playerGui = player:WaitForChild("PlayerGui")

local HOTSPOT_X = 31
local HOTSPOT_Y = 1
local CURSOR_WIDTH = 128
local CURSOR_HEIGHT = 128

local screenGui = Instance.new("ScreenGui")
screenGui.Name = "CustomCursorGui"
screenGui.ResetOnSpawn = false
screenGui.IgnoreGuiInset = true
screenGui.DisplayOrder = 999999
screenGui.Parent = playerGui

local cursor = Instance.new("ImageLabel")
cursor.Name = "CustomCursor"
cursor.BackgroundTransparency = 1
cursor.Size = UDim2.fromOffset(CURSOR_WIDTH, CURSOR_HEIGHT)
cursor.Image = "rbxassetid://YOUR_ASSET_ID"
cursor.ZIndex = 999999
cursor.Parent = screenGui

UserInputService.MouseIconEnabled = false

RunService.RenderStepped:Connect(function()
    local mouseLocation = UserInputService:GetMouseLocation()
    cursor.Position = UDim2.fromOffset(mouseLocation.X - HOTSPOT_X, mouseLocation.Y - HOTSPOT_Y)
end)
100% Gratis

Ottieni l'estensione Cursor Changer

Gratis per Chrome. Installa una volta, poi clicca su Aggiungi sul cursore che preferisci.

Installa su Chrome