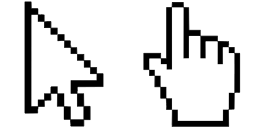
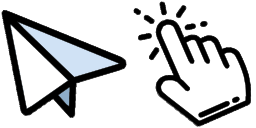
Vista previa del cursor: Telegram - 1 - cute-cursor.com

Pack de cursores

Telegram

Apps & Social MediaAdded 241 times

Telegram cursor for Chrome - themed custom pointer with matching hover hand. Chrome cursor fan art.

Añadir a la extensión

Basic Cursors Cursor Collection now offers a Telegram cursor for browsers, giving users another option to customize their cursor. The collection offers a variety of free cursors that users can download and use on their devices. The Telegram cursor features the iconic paper plane symbol and matches the messaging app's signature blue color. By using the Telegram cursor, users can add a touch of personality to their browsing experience while staying true to their messaging preferences. The Basic Cursors Cursor Collection provides a simple and fun way to bring individuality to the digital space.

Archivos del cursor

Descarga el archivo o copia CSS y código de Roblox listos con el hotspot correcto.

Cursor - 1 - cute-cursor.com

Cursor

Descarga el archivo o copia el código para tu web, React, JavaScript o Roblox.

Pega este CSS en tu hoja de estilos. Las coordenadas del hotspot ya están incluidas.

.custom-cursor {
  cursor: url('https://cute-cursor.com/cdn/packs/10817/arrow.png') 2 9, auto;
}

Pega este JavaScript para aplicar el cursor con el hotspot correcto.

const CURSOR_URL = 'https://cute-cursor.com/cdn/packs/10817/arrow.png';
const HOTSPOT_X = 2;
const HOTSPOT_Y = 9;
const CURSOR_FALLBACK = 'auto';

const cursorValue = `url('${CURSOR_URL}') ${HOTSPOT_X} ${HOTSPOT_Y}, ${CURSOR_FALLBACK}`;

// Apply to the whole page
document.body.style.cursor = cursorValue;

// Or apply to a specific element
// const target = document.querySelector('.my-element');
// if (target) target.style.cursor = cursorValue;

Copia este componente React y envuelve tu contenido con él.

import React from 'react';

const CURSOR_URL = 'https://cute-cursor.com/cdn/packs/10817/arrow.png';
const HOTSPOT_X = 2;
const HOTSPOT_Y = 9;
const CURSOR_FALLBACK = 'auto';

export default function CustomCursor({ children, className = '', as: Tag = 'div', style = {}, ...props }) {
  const cursorStyle = {
    cursor: `url('${CURSOR_URL}') ${HOTSPOT_X} ${HOTSPOT_Y}, ${CURSOR_FALLBACK}`,
    ...style,
  };

  return (
    <Tag className={className} style={cursorStyle} {...props}>
      {children}
    </Tag>
  );
}

// Usage:
// <CustomCursor>Your content</CustomCursor>

Sube la imagen a Roblox, reemplaza YOUR_ASSET_ID y pega este LocalScript.

-- Roblox custom cursor
-- Image URL: https://cute-cursor.com/cdn/packs/10817/arrow.png
-- Hotspot: 2, 9
-- Size: 128x128
-- 1. Upload the image to Roblox and copy rbxassetid
-- 2. Replace YOUR_ASSET_ID below
-- 3. Put this LocalScript in StarterPlayer > StarterPlayerScripts

local UserInputService = game:GetService("UserInputService")
local RunService = game:GetService("RunService")
local Players = game:GetService("Players")

local player = Players.LocalPlayer
local playerGui = player:WaitForChild("PlayerGui")

local HOTSPOT_X = 2
local HOTSPOT_Y = 9
local CURSOR_WIDTH = 128
local CURSOR_HEIGHT = 128

local screenGui = Instance.new("ScreenGui")
screenGui.Name = "CustomCursorGui"
screenGui.ResetOnSpawn = false
screenGui.IgnoreGuiInset = true
screenGui.DisplayOrder = 999999
screenGui.Parent = playerGui

local cursor = Instance.new("ImageLabel")
cursor.Name = "CustomCursor"
cursor.BackgroundTransparency = 1
cursor.Size = UDim2.fromOffset(CURSOR_WIDTH, CURSOR_HEIGHT)
cursor.Image = "rbxassetid://YOUR_ASSET_ID"
cursor.ZIndex = 999999
cursor.Parent = screenGui

UserInputService.MouseIconEnabled = false

RunService.RenderStepped:Connect(function()
    local mouseLocation = UserInputService:GetMouseLocation()
    cursor.Position = UDim2.fromOffset(mouseLocation.X - HOTSPOT_X, mouseLocation.Y - HOTSPOT_Y)
end)
Puntero - 2 - cute-cursor.com

Puntero

Descarga el archivo o copia el código para tu web, React, JavaScript o Roblox.

Pega este CSS en tu hoja de estilos. Las coordenadas del hotspot ya están incluidas.

.custom-pointer {
  cursor: url('https://cute-cursor.com/cdn/packs/10817/hand.png') 17 10, pointer;
}

Pega este JavaScript para aplicar el cursor con el hotspot correcto.

const CURSOR_URL = 'https://cute-cursor.com/cdn/packs/10817/hand.png';
const HOTSPOT_X = 17;
const HOTSPOT_Y = 10;
const CURSOR_FALLBACK = 'pointer';

const cursorValue = `url('${CURSOR_URL}') ${HOTSPOT_X} ${HOTSPOT_Y}, ${CURSOR_FALLBACK}`;

// Apply to the whole page
document.body.style.cursor = cursorValue;

// Or apply to a specific element
// const target = document.querySelector('.my-element');
// if (target) target.style.cursor = cursorValue;

Copia este componente React y envuelve tu contenido con él.

import React from 'react';

const CURSOR_URL = 'https://cute-cursor.com/cdn/packs/10817/hand.png';
const HOTSPOT_X = 17;
const HOTSPOT_Y = 10;
const CURSOR_FALLBACK = 'pointer';

export default function CustomPointer({ children, className = '', as: Tag = 'div', style = {}, ...props }) {
  const cursorStyle = {
    cursor: `url('${CURSOR_URL}') ${HOTSPOT_X} ${HOTSPOT_Y}, ${CURSOR_FALLBACK}`,
    ...style,
  };

  return (
    <Tag className={className} style={cursorStyle} {...props}>
      {children}
    </Tag>
  );
}

// Usage:
// <CustomPointer>Your content</CustomPointer>

Sube la imagen a Roblox, reemplaza YOUR_ASSET_ID y pega este LocalScript.

-- Roblox custom cursor
-- Image URL: https://cute-cursor.com/cdn/packs/10817/hand.png
-- Hotspot: 17, 10
-- Size: 128x128
-- 1. Upload the image to Roblox and copy rbxassetid
-- 2. Replace YOUR_ASSET_ID below
-- 3. Put this LocalScript in StarterPlayer > StarterPlayerScripts

local UserInputService = game:GetService("UserInputService")
local RunService = game:GetService("RunService")
local Players = game:GetService("Players")

local player = Players.LocalPlayer
local playerGui = player:WaitForChild("PlayerGui")

local HOTSPOT_X = 17
local HOTSPOT_Y = 10
local CURSOR_WIDTH = 128
local CURSOR_HEIGHT = 128

local screenGui = Instance.new("ScreenGui")
screenGui.Name = "CustomCursorGui"
screenGui.ResetOnSpawn = false
screenGui.IgnoreGuiInset = true
screenGui.DisplayOrder = 999999
screenGui.Parent = playerGui

local cursor = Instance.new("ImageLabel")
cursor.Name = "CustomCursor"
cursor.BackgroundTransparency = 1
cursor.Size = UDim2.fromOffset(CURSOR_WIDTH, CURSOR_HEIGHT)
cursor.Image = "rbxassetid://YOUR_ASSET_ID"
cursor.ZIndex = 999999
cursor.Parent = screenGui

UserInputService.MouseIconEnabled = false

RunService.RenderStepped:Connect(function()
    local mouseLocation = UserInputService:GetMouseLocation()
    cursor.Position = UDim2.fromOffset(mouseLocation.X - HOTSPOT_X, mouseLocation.Y - HOTSPOT_Y)
end)
100 % gratis

Get the Cursor Changer extension

Gratis en Chrome. Instala la extensión y pulsa «Añadir» en cualquier cursor.

Instalar en Chrome