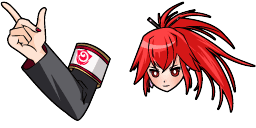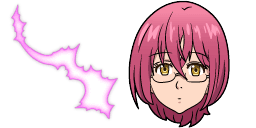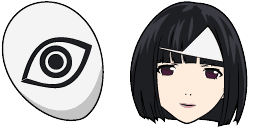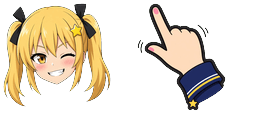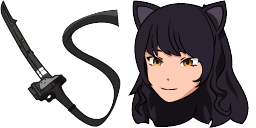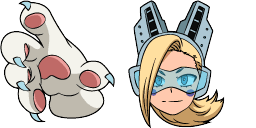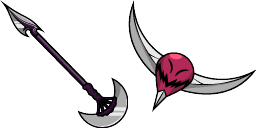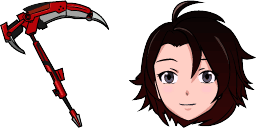
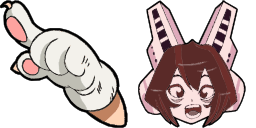
Cursor-Vorschau: My Hero Academia Shino Sosaki - 1 - cute-cursor.com

Cursor-Paket

My Hero Academia Shino Sosaki

Anime709 Mal hinzugefügt

My Hero Academia Shino Sosaki cursor for Chrome - shinobi pointer with ninja hover hand. Naruto anime fan art.
Zur Erweiterung hinzufügen

Introducing the Shino Sosaki cursor from the My Hero Academia anime series, now available in the Anime Cursor Collection! Shino Sosaki, also known as the hero "Mandalay," is a member of the pro hero group known as the Wild, Wild Pussycats. With her quirk that allows her to telepathically communicate with animals, she is a valuable asset in any hero mission. Now you can show off your love for her with our customizable mouse cursor, featuring her iconic cat ears and laid-back personality. Download now and become a true Mandalay fan!

Cursor-Dateien

Lade die Datei herunter oder kopiere fertigen CSS-, JavaScript-, React- und Roblox-Code mit dem richtigen Hotspot.

Cursor - 1 - cute-cursor.com

Cursor

Lade die Datei herunter oder kopiere den Einbettungscode für deine Website, React, JavaScript oder Roblox.

Füge dieses CSS in dein Stylesheet ein. Die Hotspot-Koordinaten sind bereits enthalten.

.custom-cursor {
  cursor: url('https://cute-cursor.com/cdn/packs/10662/arrow.png') 1 1, auto;
}

Füge dieses JavaScript ein, um den Cursor mit dem richtigen Hotspot anzuwenden.

const CURSOR_URL = 'https://cute-cursor.com/cdn/packs/10662/arrow.png';
const HOTSPOT_X = 1;
const HOTSPOT_Y = 1;
const CURSOR_FALLBACK = 'auto';

const cursorValue = `url('${CURSOR_URL}') ${HOTSPOT_X} ${HOTSPOT_Y}, ${CURSOR_FALLBACK}`;

// Apply to the whole page
document.body.style.cursor = cursorValue;

// Or apply to a specific element
// const target = document.querySelector('.my-element');
// if (target) target.style.cursor = cursorValue;

Kopiere diese React-Komponente und umschließe deinen Inhalt damit.

import React from 'react';

const CURSOR_URL = 'https://cute-cursor.com/cdn/packs/10662/arrow.png';
const HOTSPOT_X = 1;
const HOTSPOT_Y = 1;
const CURSOR_FALLBACK = 'auto';

export default function CustomCursor({ children, className = '', as: Tag = 'div', style = {}, ...props }) {
  const cursorStyle = {
    cursor: `url('${CURSOR_URL}') ${HOTSPOT_X} ${HOTSPOT_Y}, ${CURSOR_FALLBACK}`,
    ...style,
  };

  return (
    <Tag className={className} style={cursorStyle} {...props}>
      {children}
    </Tag>
  );
}

// Usage:
// <CustomCursor>Your content</CustomCursor>

Lade das Bild zu Roblox hoch, ersetze YOUR_ASSET_ID und füge dann dieses LocalScript ein.

-- Roblox custom cursor
-- Image URL: https://cute-cursor.com/cdn/packs/10662/arrow.png
-- Hotspot: 1, 1
-- Size: 128x128
-- 1. Upload the image to Roblox and copy rbxassetid
-- 2. Replace YOUR_ASSET_ID below
-- 3. Put this LocalScript in StarterPlayer > StarterPlayerScripts

local UserInputService = game:GetService("UserInputService")
local RunService = game:GetService("RunService")
local Players = game:GetService("Players")

local player = Players.LocalPlayer
local playerGui = player:WaitForChild("PlayerGui")

local HOTSPOT_X = 1
local HOTSPOT_Y = 1
local CURSOR_WIDTH = 128
local CURSOR_HEIGHT = 128

local screenGui = Instance.new("ScreenGui")
screenGui.Name = "CustomCursorGui"
screenGui.ResetOnSpawn = false
screenGui.IgnoreGuiInset = true
screenGui.DisplayOrder = 999999
screenGui.Parent = playerGui

local cursor = Instance.new("ImageLabel")
cursor.Name = "CustomCursor"
cursor.BackgroundTransparency = 1
cursor.Size = UDim2.fromOffset(CURSOR_WIDTH, CURSOR_HEIGHT)
cursor.Image = "rbxassetid://YOUR_ASSET_ID"
cursor.ZIndex = 999999
cursor.Parent = screenGui

UserInputService.MouseIconEnabled = false

RunService.RenderStepped:Connect(function()
    local mouseLocation = UserInputService:GetMouseLocation()
    cursor.Position = UDim2.fromOffset(mouseLocation.X - HOTSPOT_X, mouseLocation.Y - HOTSPOT_Y)
end)
Zeiger - 2 - cute-cursor.com

Zeiger

Lade die Datei herunter oder kopiere den Einbettungscode für deine Website, React, JavaScript oder Roblox.

Füge dieses CSS in dein Stylesheet ein. Die Hotspot-Koordinaten sind bereits enthalten.

.custom-pointer {
  cursor: url('https://cute-cursor.com/cdn/packs/10662/hand.png') 30 0, pointer;
}

Füge dieses JavaScript ein, um den Cursor mit dem richtigen Hotspot anzuwenden.

const CURSOR_URL = 'https://cute-cursor.com/cdn/packs/10662/hand.png';
const HOTSPOT_X = 30;
const HOTSPOT_Y = 0;
const CURSOR_FALLBACK = 'pointer';

const cursorValue = `url('${CURSOR_URL}') ${HOTSPOT_X} ${HOTSPOT_Y}, ${CURSOR_FALLBACK}`;

// Apply to the whole page
document.body.style.cursor = cursorValue;

// Or apply to a specific element
// const target = document.querySelector('.my-element');
// if (target) target.style.cursor = cursorValue;

Kopiere diese React-Komponente und umschließe deinen Inhalt damit.

import React from 'react';

const CURSOR_URL = 'https://cute-cursor.com/cdn/packs/10662/hand.png';
const HOTSPOT_X = 30;
const HOTSPOT_Y = 0;
const CURSOR_FALLBACK = 'pointer';

export default function CustomPointer({ children, className = '', as: Tag = 'div', style = {}, ...props }) {
  const cursorStyle = {
    cursor: `url('${CURSOR_URL}') ${HOTSPOT_X} ${HOTSPOT_Y}, ${CURSOR_FALLBACK}`,
    ...style,
  };

  return (
    <Tag className={className} style={cursorStyle} {...props}>
      {children}
    </Tag>
  );
}

// Usage:
// <CustomPointer>Your content</CustomPointer>

Lade das Bild zu Roblox hoch, ersetze YOUR_ASSET_ID und füge dann dieses LocalScript ein.

-- Roblox custom cursor
-- Image URL: https://cute-cursor.com/cdn/packs/10662/hand.png
-- Hotspot: 30, 0
-- Size: 128x128
-- 1. Upload the image to Roblox and copy rbxassetid
-- 2. Replace YOUR_ASSET_ID below
-- 3. Put this LocalScript in StarterPlayer > StarterPlayerScripts

local UserInputService = game:GetService("UserInputService")
local RunService = game:GetService("RunService")
local Players = game:GetService("Players")

local player = Players.LocalPlayer
local playerGui = player:WaitForChild("PlayerGui")

local HOTSPOT_X = 30
local HOTSPOT_Y = 0
local CURSOR_WIDTH = 128
local CURSOR_HEIGHT = 128

local screenGui = Instance.new("ScreenGui")
screenGui.Name = "CustomCursorGui"
screenGui.ResetOnSpawn = false
screenGui.IgnoreGuiInset = true
screenGui.DisplayOrder = 999999
screenGui.Parent = playerGui

local cursor = Instance.new("ImageLabel")
cursor.Name = "CustomCursor"
cursor.BackgroundTransparency = 1
cursor.Size = UDim2.fromOffset(CURSOR_WIDTH, CURSOR_HEIGHT)
cursor.Image = "rbxassetid://YOUR_ASSET_ID"
cursor.ZIndex = 999999
cursor.Parent = screenGui

UserInputService.MouseIconEnabled = false

RunService.RenderStepped:Connect(function()
    local mouseLocation = UserInputService:GetMouseLocation()
    cursor.Position = UDim2.fromOffset(mouseLocation.X - HOTSPOT_X, mouseLocation.Y - HOTSPOT_Y)
end)
100 % kostenlos

Hol dir die Cursor-Wechsler-Erweiterung

Kostenlos für Chrome. Einmal installieren, dann bei jedem gewünschten Cursor auf „Hinzufügen“ klicken.

Zu Chrome hinzufügen