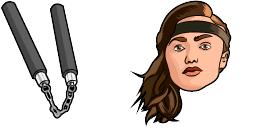
Robocop pointer for Chrome with scary hover. Horror movie fan art.
Add to Extension
Related Cursor Packs from the Movies Category
More cursor packs from the Movies category and similar styles.
34 related cursor packs
Sort by:
View:
Elijah Mikaelson cursor
Elijah Mikaelson custom cursor - a cute themed pointer for your desktop.
Add
Christmas Mcclane cursor
Christmas Mcclane custom cursor - a cute themed pointer for your desktop.
Add
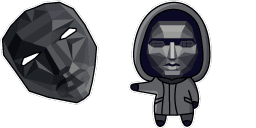
Squid Game Front Man cursor
Squid Game Front Man custom cursor - a cute themed pointer for your desktop.
Add
Nailed It Cupcake cursor
Nailed It Cupcake custom cursor - a cute themed pointer for your desktop.
Add
Storm Nana Patekar Cursor cursor
Storm Nana Patekar Cursor custom cursor - a cute themed pointer for your desktop.
Add
Remy Ratatouille cursor
Remy Ratatouille custom cursor - a cute themed pointer for your desktop.
Add
ELF And MR Narwhal cursor
ELF And MR Narwhal custom cursor - a cute themed pointer for your desktop.
Add
Toy Story Rex cursor
Toy Story Rex custom cursor - a cute themed pointer for your desktop.
Add
Katniss Everdeen cursor
Katniss Everdeen custom cursor - a cute themed pointer for your desktop.
Add
Joey Tribbiani cursor
Joey Tribbiani custom cursor - a cute themed pointer for your desktop.
Add
Cute Color Reel cursor
Cute Color Reel custom cursor - a cute themed pointer for your desktop.
Add
Luca Paguro cursor
Luca Paguro custom cursor - a cute themed pointer for your desktop.
Add
Squid Game Player 456 cursor
Squid Game Player 456 custom cursor - a cute themed pointer for your desktop.
Add
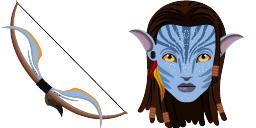
Neytiri Avatar cursor
Neytiri Avatar custom cursor - a cute themed pointer for your desktop.
Add
Home Alone cursor
Home Alone custom cursor - a cute themed pointer for your desktop.
Add
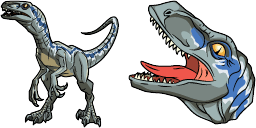
Dinocute cursor
Dinocute custom cursor - a cute themed pointer for your desktop.
Add
Hellraiser Revival Cursor cursor
Hellraiser Revival Cursor custom cursor - a cute themed pointer for your desktop.
Add
Professor X cursor
Professor X custom cursor - a cute themed pointer for your desktop.
Add
Cobra KAI Cute Mouse cursor
Cobra KAI Cute Mouse custom cursor - a cute themed pointer for your desktop.
Add
Paddington cursor
Paddington custom cursor - a cute themed pointer for your desktop.
Add
Mr. Potato Head cursor
Mr. Potato Head custom cursor - a cute themed pointer for your desktop.
Add
Alien cursor
Alien custom cursor - a cute themed pointer for your desktop.
Add
Story Mode Sword cursor
Story Mode Sword custom cursor - a cute themed pointer for your desktop.
Add
Movie Magic cursor
Movie Magic custom cursor - a cute themed pointer for your desktop.
Add
Breaking BAD Walter White cursor
Breaking BAD Walter White custom cursor - a cute themed pointer for your desktop.
Add
Violet Baudelaire cursor
Violet Baudelaire custom cursor - a cute themed pointer for your desktop.
Add
Cloudy Meatballs Flint cursor
Cloudy Meatballs Flint custom cursor - a cute themed pointer for your desktop.
Add
Bluestone Wall cursor
Bluestone Wall custom cursor - a cute themed pointer for your desktop.
Add
Cloudy Sam Sparks cursor
Cloudy Sam Sparks custom cursor - a cute themed pointer for your desktop.
Add
Optimus Prime cursor
Optimus Prime custom cursor - a cute themed pointer for your desktop.
Add
Umbrella Academy cursor
Umbrella Academy custom cursor - a cute themed pointer for your desktop.
Add
Sulley & Mike cursor
Sulley & Mike custom cursor - a cute themed pointer for your desktop.
Add
Godzilla cursor
Godzilla custom cursor - a cute themed pointer for your desktop.
Add
Young-Hee Doll cursor
Young-Hee Doll custom cursor - a cute themed pointer for your desktop.
Add
About this custom cursor pack
The Robocop cursor from the Movies Cursor Collection is a must-have for any fan of the iconic 80s film. Featuring the sleek and futuristic design of the iconic cyborg police officer, this cursor adds a touch of nostalgia to your browsing experience. With its high-quality graphics and smooth animations, the Robocop cursor is sure to impress. So why settle for a boring default cursor when you can upgrade to something as cool as this? Download the Robocop cursor today and take your browsing to the next level!
100% Free
Get the Cursor Changer extension
Free for Chrome. Install once, then click Add on any cursor you like.