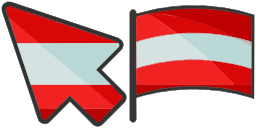

Aperçu du curseur : United Arab Emirates - 1 - cute-cursor.com

Pack de curseurs

United Arab Emirates

FlagsAdded 110 times

Browse with United Arab Emirates - a Chrome cursor featuring themed custom pointer and matching hover. Chrome cursor fan art.

Ajouter à l'extension

Introducing the United Arab Emirates cursor from our Flags Cursor Collection! This cursor features the colors of the UAE flag - red, green, white, and black. It's perfect for anyone who wants to show their love for the UAE or simply add some fun and flair to their browsing experience. With a sleek and modern design, this cursor is sure to catch the eye of anyone who sees it. Try it out today and see what all the fuss is about!

Fichiers curseur

Téléchargez le fichier ou copiez le CSS et le code Roblox prêts à l'emploi avec le bon hotspot.

Curseur - 1 - cute-cursor.com

Curseur

Téléchargez le fichier ou copiez le code pour votre site, React, JavaScript ou Roblox.

Collez ce CSS dans votre feuille de style. Les coordonnées du hotspot sont déjà incluses.

.custom-cursor {
  cursor: url('https://cute-cursor.com/cdn/packs/10299/arrow.png') 3 2, auto;
}

Collez ce JavaScript pour appliquer le curseur avec le bon hotspot.

const CURSOR_URL = 'https://cute-cursor.com/cdn/packs/10299/arrow.png';
const HOTSPOT_X = 3;
const HOTSPOT_Y = 2;
const CURSOR_FALLBACK = 'auto';

const cursorValue = `url('${CURSOR_URL}') ${HOTSPOT_X} ${HOTSPOT_Y}, ${CURSOR_FALLBACK}`;

// Apply to the whole page
document.body.style.cursor = cursorValue;

// Or apply to a specific element
// const target = document.querySelector('.my-element');
// if (target) target.style.cursor = cursorValue;

Copiez ce composant React et enveloppez votre contenu avec.

import React from 'react';

const CURSOR_URL = 'https://cute-cursor.com/cdn/packs/10299/arrow.png';
const HOTSPOT_X = 3;
const HOTSPOT_Y = 2;
const CURSOR_FALLBACK = 'auto';

export default function CustomCursor({ children, className = '', as: Tag = 'div', style = {}, ...props }) {
  const cursorStyle = {
    cursor: `url('${CURSOR_URL}') ${HOTSPOT_X} ${HOTSPOT_Y}, ${CURSOR_FALLBACK}`,
    ...style,
  };

  return (
    <Tag className={className} style={cursorStyle} {...props}>
      {children}
    </Tag>
  );
}

// Usage:
// <CustomCursor>Your content</CustomCursor>

Importez l'image dans Roblox, remplacez YOUR_ASSET_ID, puis collez ce LocalScript.

-- Roblox custom cursor
-- Image URL: https://cute-cursor.com/cdn/packs/10299/arrow.png
-- Hotspot: 3, 2
-- Size: 128x128
-- 1. Upload the image to Roblox and copy rbxassetid
-- 2. Replace YOUR_ASSET_ID below
-- 3. Put this LocalScript in StarterPlayer > StarterPlayerScripts

local UserInputService = game:GetService("UserInputService")
local RunService = game:GetService("RunService")
local Players = game:GetService("Players")

local player = Players.LocalPlayer
local playerGui = player:WaitForChild("PlayerGui")

local HOTSPOT_X = 3
local HOTSPOT_Y = 2
local CURSOR_WIDTH = 128
local CURSOR_HEIGHT = 128

local screenGui = Instance.new("ScreenGui")
screenGui.Name = "CustomCursorGui"
screenGui.ResetOnSpawn = false
screenGui.IgnoreGuiInset = true
screenGui.DisplayOrder = 999999
screenGui.Parent = playerGui

local cursor = Instance.new("ImageLabel")
cursor.Name = "CustomCursor"
cursor.BackgroundTransparency = 1
cursor.Size = UDim2.fromOffset(CURSOR_WIDTH, CURSOR_HEIGHT)
cursor.Image = "rbxassetid://YOUR_ASSET_ID"
cursor.ZIndex = 999999
cursor.Parent = screenGui

UserInputService.MouseIconEnabled = false

RunService.RenderStepped:Connect(function()
    local mouseLocation = UserInputService:GetMouseLocation()
    cursor.Position = UDim2.fromOffset(mouseLocation.X - HOTSPOT_X, mouseLocation.Y - HOTSPOT_Y)
end)
Pointeur - 2 - cute-cursor.com

Pointeur

Téléchargez le fichier ou copiez le code pour votre site, React, JavaScript ou Roblox.

Collez ce CSS dans votre feuille de style. Les coordonnées du hotspot sont déjà incluses.

.custom-pointer {
  cursor: url('https://cute-cursor.com/cdn/packs/10299/hand.png') 31 3, pointer;
}

Collez ce JavaScript pour appliquer le curseur avec le bon hotspot.

const CURSOR_URL = 'https://cute-cursor.com/cdn/packs/10299/hand.png';
const HOTSPOT_X = 31;
const HOTSPOT_Y = 3;
const CURSOR_FALLBACK = 'pointer';

const cursorValue = `url('${CURSOR_URL}') ${HOTSPOT_X} ${HOTSPOT_Y}, ${CURSOR_FALLBACK}`;

// Apply to the whole page
document.body.style.cursor = cursorValue;

// Or apply to a specific element
// const target = document.querySelector('.my-element');
// if (target) target.style.cursor = cursorValue;

Copiez ce composant React et enveloppez votre contenu avec.

import React from 'react';

const CURSOR_URL = 'https://cute-cursor.com/cdn/packs/10299/hand.png';
const HOTSPOT_X = 31;
const HOTSPOT_Y = 3;
const CURSOR_FALLBACK = 'pointer';

export default function CustomPointer({ children, className = '', as: Tag = 'div', style = {}, ...props }) {
  const cursorStyle = {
    cursor: `url('${CURSOR_URL}') ${HOTSPOT_X} ${HOTSPOT_Y}, ${CURSOR_FALLBACK}`,
    ...style,
  };

  return (
    <Tag className={className} style={cursorStyle} {...props}>
      {children}
    </Tag>
  );
}

// Usage:
// <CustomPointer>Your content</CustomPointer>

Importez l'image dans Roblox, remplacez YOUR_ASSET_ID, puis collez ce LocalScript.

-- Roblox custom cursor
-- Image URL: https://cute-cursor.com/cdn/packs/10299/hand.png
-- Hotspot: 31, 3
-- Size: 128x128
-- 1. Upload the image to Roblox and copy rbxassetid
-- 2. Replace YOUR_ASSET_ID below
-- 3. Put this LocalScript in StarterPlayer > StarterPlayerScripts

local UserInputService = game:GetService("UserInputService")
local RunService = game:GetService("RunService")
local Players = game:GetService("Players")

local player = Players.LocalPlayer
local playerGui = player:WaitForChild("PlayerGui")

local HOTSPOT_X = 31
local HOTSPOT_Y = 3
local CURSOR_WIDTH = 128
local CURSOR_HEIGHT = 128

local screenGui = Instance.new("ScreenGui")
screenGui.Name = "CustomCursorGui"
screenGui.ResetOnSpawn = false
screenGui.IgnoreGuiInset = true
screenGui.DisplayOrder = 999999
screenGui.Parent = playerGui

local cursor = Instance.new("ImageLabel")
cursor.Name = "CustomCursor"
cursor.BackgroundTransparency = 1
cursor.Size = UDim2.fromOffset(CURSOR_WIDTH, CURSOR_HEIGHT)
cursor.Image = "rbxassetid://YOUR_ASSET_ID"
cursor.ZIndex = 999999
cursor.Parent = screenGui

UserInputService.MouseIconEnabled = false

RunService.RenderStepped:Connect(function()
    local mouseLocation = UserInputService:GetMouseLocation()
    cursor.Position = UDim2.fromOffset(mouseLocation.X - HOTSPOT_X, mouseLocation.Y - HOTSPOT_Y)
end)
100 % gratuit

Get the Cursor Changer extension

Gratuit sur Chrome. Installez l'extension, puis cliquez sur « Ajouter ».

Installer sur Chrome