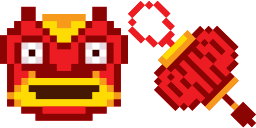

光标预览:March 8th flower - 1 - cute-cursor.com

光标包

March 8th flower

Holidays & Events已添加 165 次

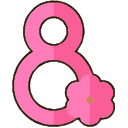
March 8th flower cursor for Chrome - themed custom pointer with matching hover hand. Chrome cursor fan art.

添加到扩展

The Basic cursors Cursor Collection offers a March 8th flower cursor for your browser. This collection features a variety of simple, yet aesthetically pleasing, cursors that are ideal for personalizing your online experience. With the March 8th flower cursor, you can celebrate International Women's Day in style. The elegant design is sure to delight and impress, while the easy installation process ensures that you can start using your new cursor right away. If you're looking for a fun and easy way to add some flair to your browsing experience, the Basic cursors Cursor Collection is the perfect choice.

光标文件

下载文件,或复制包含正确热点坐标的即用型 CSS、JavaScript、React 和 Roblox 代码。

光标 - 1 - cute-cursor.com

光标

下载文件,或复制适用于你的网站、React、JavaScript 或 Roblox 的嵌入代码。

将此 CSS 粘贴到你的样式表中,已包含热点坐标。

.custom-cursor {
  cursor: url('https://cute-cursor.com/cdn/packs/10142/arrow.png') 19 2, auto;
}

粘贴此 JavaScript 代码,即可应用带有正确热点坐标的光标。

const CURSOR_URL = 'https://cute-cursor.com/cdn/packs/10142/arrow.png';
const HOTSPOT_X = 19;
const HOTSPOT_Y = 2;
const CURSOR_FALLBACK = 'auto';

const cursorValue = `url('${CURSOR_URL}') ${HOTSPOT_X} ${HOTSPOT_Y}, ${CURSOR_FALLBACK}`;

// Apply to the whole page
document.body.style.cursor = cursorValue;

// Or apply to a specific element
// const target = document.querySelector('.my-element');
// if (target) target.style.cursor = cursorValue;

复制此 React 组件,并用它包裹你的内容。

import React from 'react';

const CURSOR_URL = 'https://cute-cursor.com/cdn/packs/10142/arrow.png';
const HOTSPOT_X = 19;
const HOTSPOT_Y = 2;
const CURSOR_FALLBACK = 'auto';

export default function CustomCursor({ children, className = '', as: Tag = 'div', style = {}, ...props }) {
  const cursorStyle = {
    cursor: `url('${CURSOR_URL}') ${HOTSPOT_X} ${HOTSPOT_Y}, ${CURSOR_FALLBACK}`,
    ...style,
  };

  return (
    <Tag className={className} style={cursorStyle} {...props}>
      {children}
    </Tag>
  );
}

// Usage:
// <CustomCursor>Your content</CustomCursor>

将图片上传到 Roblox,替换 YOUR_ASSET_ID,然后粘贴此 LocalScript。

-- Roblox custom cursor
-- Image URL: https://cute-cursor.com/cdn/packs/10142/arrow.png
-- Hotspot: 19, 2
-- Size: 128x128
-- 1. Upload the image to Roblox and copy rbxassetid
-- 2. Replace YOUR_ASSET_ID below
-- 3. Put this LocalScript in StarterPlayer > StarterPlayerScripts

local UserInputService = game:GetService("UserInputService")
local RunService = game:GetService("RunService")
local Players = game:GetService("Players")

local player = Players.LocalPlayer
local playerGui = player:WaitForChild("PlayerGui")

local HOTSPOT_X = 19
local HOTSPOT_Y = 2
local CURSOR_WIDTH = 128
local CURSOR_HEIGHT = 128

local screenGui = Instance.new("ScreenGui")
screenGui.Name = "CustomCursorGui"
screenGui.ResetOnSpawn = false
screenGui.IgnoreGuiInset = true
screenGui.DisplayOrder = 999999
screenGui.Parent = playerGui

local cursor = Instance.new("ImageLabel")
cursor.Name = "CustomCursor"
cursor.BackgroundTransparency = 1
cursor.Size = UDim2.fromOffset(CURSOR_WIDTH, CURSOR_HEIGHT)
cursor.Image = "rbxassetid://YOUR_ASSET_ID"
cursor.ZIndex = 999999
cursor.Parent = screenGui

UserInputService.MouseIconEnabled = false

RunService.RenderStepped:Connect(function()
    local mouseLocation = UserInputService:GetMouseLocation()
    cursor.Position = UDim2.fromOffset(mouseLocation.X - HOTSPOT_X, mouseLocation.Y - HOTSPOT_Y)
end)
指针 - 2 - cute-cursor.com

指针

下载文件,或复制适用于你的网站、React、JavaScript 或 Roblox 的嵌入代码。

将此 CSS 粘贴到你的样式表中,已包含热点坐标。

.custom-pointer {
  cursor: url('https://cute-cursor.com/cdn/packs/10142/hand.png') 26 2, pointer;
}

粘贴此 JavaScript 代码,即可应用带有正确热点坐标的光标。

const CURSOR_URL = 'https://cute-cursor.com/cdn/packs/10142/hand.png';
const HOTSPOT_X = 26;
const HOTSPOT_Y = 2;
const CURSOR_FALLBACK = 'pointer';

const cursorValue = `url('${CURSOR_URL}') ${HOTSPOT_X} ${HOTSPOT_Y}, ${CURSOR_FALLBACK}`;

// Apply to the whole page
document.body.style.cursor = cursorValue;

// Or apply to a specific element
// const target = document.querySelector('.my-element');
// if (target) target.style.cursor = cursorValue;

复制此 React 组件,并用它包裹你的内容。

import React from 'react';

const CURSOR_URL = 'https://cute-cursor.com/cdn/packs/10142/hand.png';
const HOTSPOT_X = 26;
const HOTSPOT_Y = 2;
const CURSOR_FALLBACK = 'pointer';

export default function CustomPointer({ children, className = '', as: Tag = 'div', style = {}, ...props }) {
  const cursorStyle = {
    cursor: `url('${CURSOR_URL}') ${HOTSPOT_X} ${HOTSPOT_Y}, ${CURSOR_FALLBACK}`,
    ...style,
  };

  return (
    <Tag className={className} style={cursorStyle} {...props}>
      {children}
    </Tag>
  );
}

// Usage:
// <CustomPointer>Your content</CustomPointer>

将图片上传到 Roblox,替换 YOUR_ASSET_ID,然后粘贴此 LocalScript。

-- Roblox custom cursor
-- Image URL: https://cute-cursor.com/cdn/packs/10142/hand.png
-- Hotspot: 26, 2
-- Size: 128x128
-- 1. Upload the image to Roblox and copy rbxassetid
-- 2. Replace YOUR_ASSET_ID below
-- 3. Put this LocalScript in StarterPlayer > StarterPlayerScripts

local UserInputService = game:GetService("UserInputService")
local RunService = game:GetService("RunService")
local Players = game:GetService("Players")

local player = Players.LocalPlayer
local playerGui = player:WaitForChild("PlayerGui")

local HOTSPOT_X = 26
local HOTSPOT_Y = 2
local CURSOR_WIDTH = 128
local CURSOR_HEIGHT = 128

local screenGui = Instance.new("ScreenGui")
screenGui.Name = "CustomCursorGui"
screenGui.ResetOnSpawn = false
screenGui.IgnoreGuiInset = true
screenGui.DisplayOrder = 999999
screenGui.Parent = playerGui

local cursor = Instance.new("ImageLabel")
cursor.Name = "CustomCursor"
cursor.BackgroundTransparency = 1
cursor.Size = UDim2.fromOffset(CURSOR_WIDTH, CURSOR_HEIGHT)
cursor.Image = "rbxassetid://YOUR_ASSET_ID"
cursor.ZIndex = 999999
cursor.Parent = screenGui

UserInputService.MouseIconEnabled = false

RunService.RenderStepped:Connect(function()
    local mouseLocation = UserInputService:GetMouseLocation()
    cursor.Position = UDim2.fromOffset(mouseLocation.X - HOTSPOT_X, mouseLocation.Y - HOTSPOT_Y)
end)
100% 免费

获取光标切换器扩展

Chrome 免费使用。只需安装一次,然后点击你喜欢的任意光标上的“添加”即可。

安装到 Chrome